
Cherry blossoms are admired around the world for their delicate beauty, soft colors, and symbolism of renewal, hope, and the arrival of spring. Their five-petaled flowers inspire artists, designers, and crafters of all ages. A fun way for children to celebrate these iconic blooms is by creating cherry blossom-shaped beads that can be transformed into jewelry, keychains, bookmarks, decorations, or keepsakes.
This hands-on craft project combines creativity with fine motor practice, allowing children to design colorful floral beads using simple craft materials. Whether made from air-dry clay, polymer clay, modeling dough, or other child-friendly materials, each bead becomes a miniature work of art that reflects the child’s imagination.
Perfect for classrooms, art clubs, homeschool lessons, spring festivals, or family craft afternoons, this project encourages artistic expression while introducing children to flowers, nature, and basic jewelry-making concepts.
What Are Cherry Blossom-Shaped Beads?
Cherry blossom-shaped beads are decorative beads formed to resemble the five soft petals of a cherry blossom flower. Unlike ordinary round beads, these floral beads feature carefully shaped petals surrounding a small center hole that allows them to be threaded onto string, elastic cord, ribbon, or wire.
Once finished, the beads can be combined to create many different handmade accessories and decorations. Every bead is unique because children can experiment with different colors, textures, and decorative details.
Designing floral beads introduces children to both sculpture and design, making it an enjoyable combination of art and craft.
Why This Project Is Perfect for Children
Children naturally enjoy creating colorful objects they can wear or share. Cherry blossom beads are simple enough for beginners while still offering plenty of opportunities for creativity.
This project encourages children to:
- Explore nature through art.
- Practice shaping small objects.
- Improve hand strength and coordination.
- Experiment with color combinations.
- Learn patience during the crafting process.
- Create personalized handmade gifts.
The activity is relaxing and rewarding because each flower gradually takes shape with every small detail added.
Materials You’ll Need
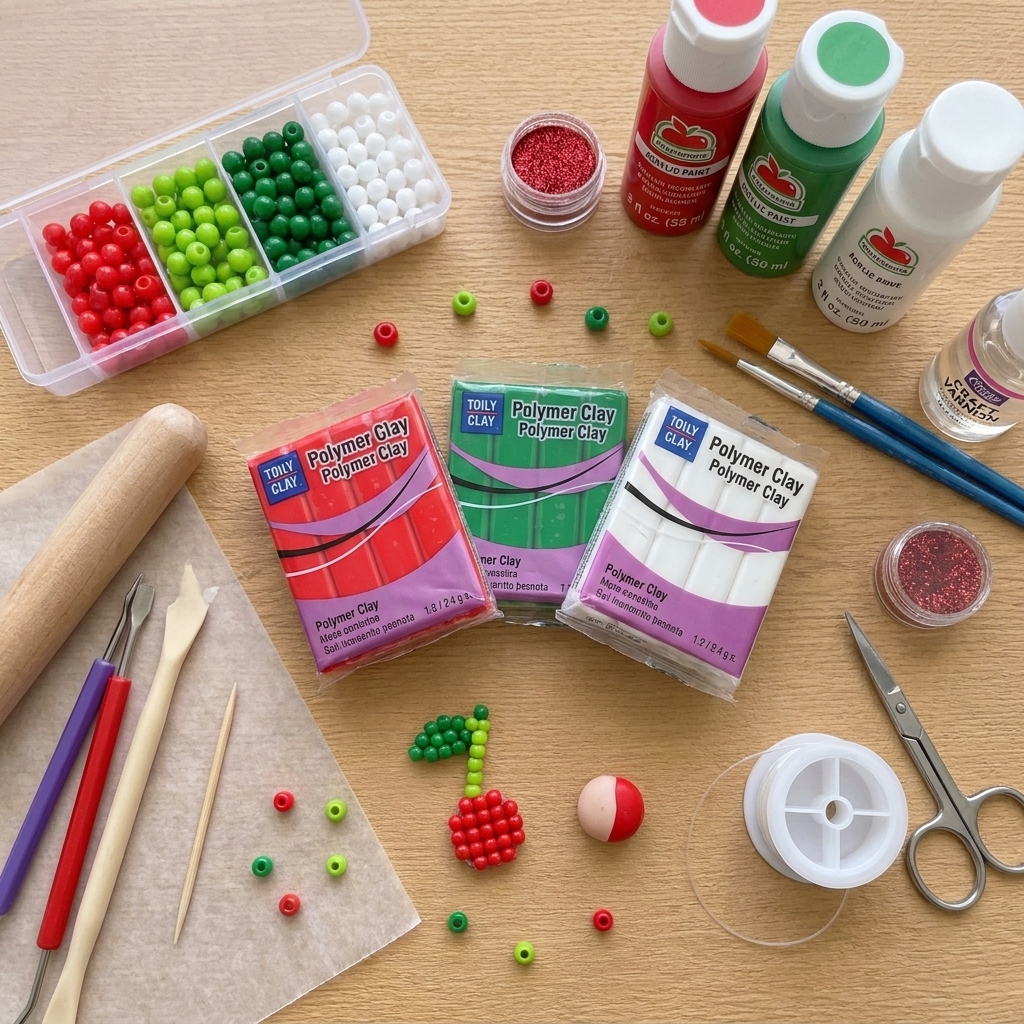
Gather your supplies before beginning.
- Air-dry clay or polymer clay
- Modeling tools
- Toothpick or skewer for bead holes
- Acrylic paint (if using plain clay)
- Paintbrushes
- Glitter (optional)
- Clear craft varnish (optional)
- Elastic cord or jewelry wire
- Scissors
- Bead tray
- Small rolling pin
- Wax paper or craft mat
Using lightweight materials makes the finished beads comfortable for jewelry and decorative projects.
Choosing Cherry Blossom Colors
Although cherry blossoms are usually pale pink, children can create flowers in nearly any color.
Popular choices include:
- Soft pink
- White
- Pale peach
- Lavender
- Baby blue
- Mint green
- Yellow
- Rainbow colors
- Glitter pink
- Metallic silver
- Metallic gold
- Coral
- Cream
- Light purple
Mixing shades creates beautiful collections of blossoms that look both realistic and imaginative.
Step-by-Step Instructions
Step 1: Prepare the Clay
Take a small amount of clay and roll it into a smooth ball.
Flatten it gently into a small disk.
Step 2: Shape the Petals
Using your fingers or a modeling tool, gently press five rounded petals outward from the center.
Try to keep each petal similar in size while allowing natural variations that make every flower unique.
Step 3: Add Flower Details
Use a toothpick or sculpting tool to create gentle lines radiating from the center toward each petal.
These small details give the flower a more realistic appearance.
Step 4: Make the Bead Hole
Carefully push a toothpick through the center of the blossom.
Rotate it gently to create a smooth hole large enough for string or wire.
Step 5: Let the Beads Dry
Allow the beads to dry completely according to the instructions for your chosen material.
Drying thoroughly prevents cracking during painting and assembly.
Step 6: Paint the Flowers
If using plain clay, paint each blossom with soft spring colors.
Children may choose realistic blossoms or imaginative fantasy flowers.
Allow each coat to dry before adding details.
Step 7: Add Decorative Touches
Optional decorations include:
- Glitter
- Tiny painted dots
- Metallic highlights
- Pearl accents
- Shimmer paint
These embellishments give the beads extra sparkle.
Step 8: Seal the Beads
A thin layer of clear varnish protects the paint and gives the flowers a polished finish.
Allow the varnish to dry completely before threading the beads.
Creative Project Ideas
Finished cherry blossom beads can be transformed into many beautiful crafts.
Some popular ideas include:
- Bracelets
- Necklaces
- Earrings
- Keychains
- Backpack charms
- Bookmarks
- Hair accessories
- Friendship gifts
- Decorative garlands
- Window ornaments
- Gift tags
- Mobile decorations
Each project lets children proudly display their handmade floral creations.
Educational Benefits
This project develops many valuable skills.
Fine Motor Skills
Shaping petals strengthens finger muscles needed for writing and other detailed tasks.
Creativity
Children learn that there is no single “correct” flower design.
Color Recognition
Choosing complementary colors helps children understand color relationships.
Concentration
Carefully sculpting small petals encourages focus and patience.
Artistic Confidence
Completing detailed flowers gives children a strong sense of achievement.
Appreciation for Nature
The activity introduces children to flowering trees and seasonal changes.
Learning About Cherry Blossoms
While crafting, adults can share interesting facts about cherry blossoms.
Children may learn that:
- Cherry blossoms bloom in spring.
- The flowers usually last only a short time.
- Cherry blossom festivals are celebrated in many countries.
- Blossoms symbolize new beginnings and hope.
- Many birds and insects visit flowering trees.
Combining art with nature creates a richer learning experience.
Classroom Applications
Teachers can easily adapt this activity for different age groups.
Students might:
- Create blossom jewelry.
- Decorate greeting cards.
- Build spring displays.
- Learn about seasons.
- Study flowering trees.
- Practice counting petals.
- Explore symmetry in flowers.
The project connects well with science, art, and cultural studies.
Personalizing Every Flower
Encourage children to make each blossom unique.
Ideas include:
- Layered petals
- Glitter centers
- Rainbow petals
- Ombre colors
- Tiny painted hearts
- Initials hidden on the back
- Metallic edges
- Textured petals
- Pearl finishes
- Swirled color effects
These details allow every child to express their own artistic style.
Safety Tips
To keep crafting enjoyable:
- Supervise younger children.
- Use child-safe sculpting tools.
- Wash hands after painting.
- Follow baking instructions if using polymer clay.
- Allow beads to dry completely before use.
- Store supplies safely after crafting.
Simple safety habits make the activity pleasant for everyone.
Displaying Finished Creations
Children love seeing their artwork become useful objects.
Finished beads can decorate:
- Pencil cases
- School bags
- Bedroom walls
- Jewelry stands
- Gift boxes
- Memory jars
- Photo frames
- Seasonal centerpieces
- Handmade cards
- Spring wreaths
Displaying handmade crafts encourages pride in creative accomplishments.
Encouraging Creativity Beyond the Project
Once children learn to sculpt flower beads, they can experiment with many other nature-inspired designs.
Future projects might include:
- Daisy beads
- Sunflower beads
- Rose beads
- Lotus beads
- Leaf-shaped beads
- Butterfly beads
- Ladybug beads
- Bee beads
- Bird charms
- Butterfly necklaces
Each new project expands their artistic skills and imagination.
Conclusion
Designing cherry blossom-shaped beads is a delightful craft that blends art, creativity, and nature into one engaging activity. With simple materials and a little imagination, children can transform small pieces of clay into elegant floral beads that become beautiful jewelry, keepsakes, and decorations.
Beyond creating attractive accessories, this project strengthens fine motor skills, encourages careful observation, and inspires appreciation for the beauty of the natural world. Whether completed at home, in the classroom, or during a spring celebration, cherry blossom bead crafting offers children a meaningful opportunity to express themselves while learning through hands-on creativity.
Every finished blossom tells its own story, making each handmade bead a unique reminder of spring, growth, and the joy of creating something beautiful by hand.
