
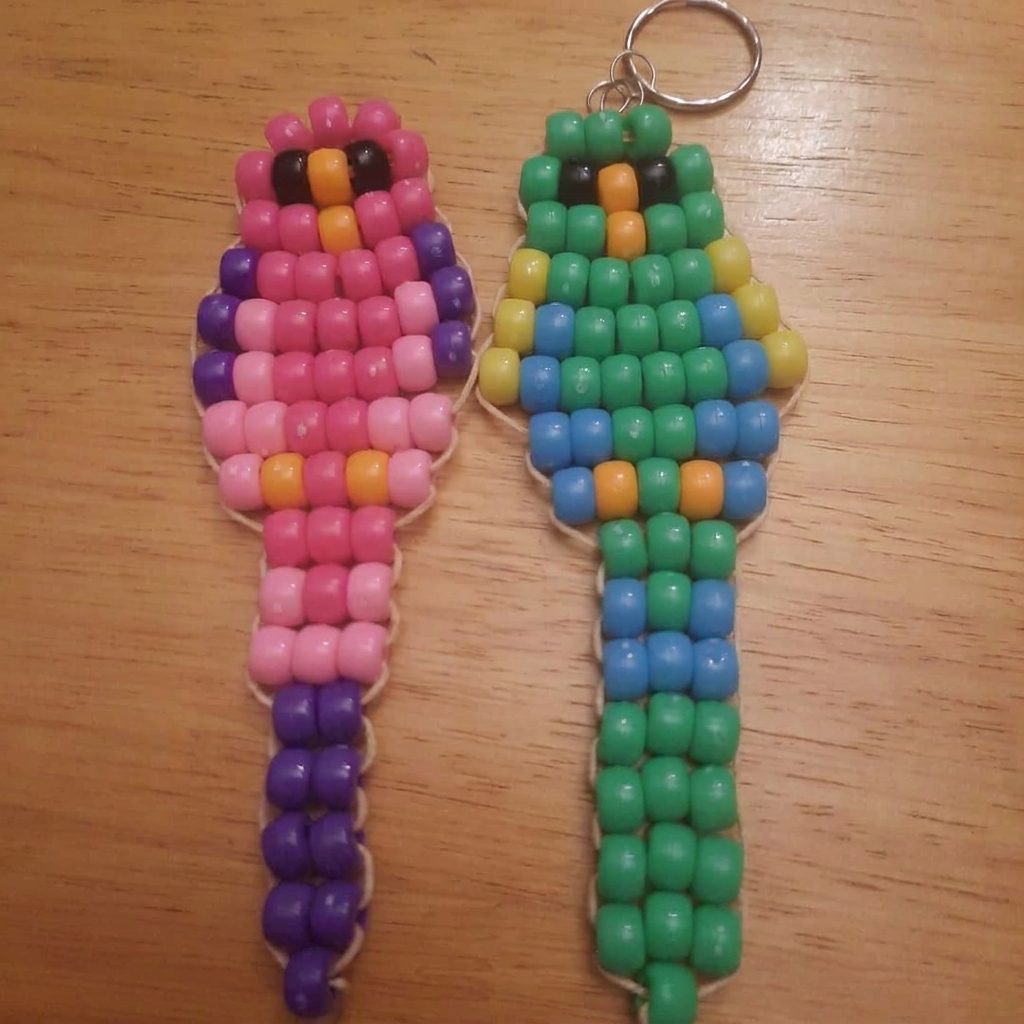
Designing bead art is a wonderful way for children to combine creativity, imagination, and hands-on learning. With just a collection of colorful beads and a simple pattern, kids can create charming characters, animals, and decorations that they can proudly display or use as accessories. One delightful project is designing a cute little parrot using green and pink beads. Inspired by the bright colors of tropical birds, this cheerful craft encourages children to experiment with color, practice pattern-making, and develop important fine motor skills.
A green and pink parrot bead design can become a keychain, backpack charm, bookmark decoration, ornament, or simply a colorful piece of bead art. The project is suitable for classrooms, homeschool activities, art clubs, summer camps, or family craft sessions. Children enjoy watching the playful bird come to life as each bead is carefully added, making the activity both relaxing and rewarding.
In this article, you’ll learn about the materials needed, design ideas, step-by-step instructions, educational benefits, and creative ways to personalize your adorable parrot bead project.
What Is a Parrot Bead Design?
A parrot bead design is a decorative craft created by arranging beads in the shape of a small bird. The beads are threaded onto plastic lacing, nylon cord, or fine craft wire according to a pattern that forms the parrot’s head, body, wings, tail, and beak.
For this project, the body features bright green beads, while soft pink beads add colorful accents to the wings, cheeks, chest, or tail. Black and white beads can be used for the eyes, and a yellow or orange bead makes a cheerful beak.
Once completed, the parrot can be attached to a key ring, displayed as a hanging ornament, or incorporated into handmade jewelry.
Why Children Love This Project
Children are naturally drawn to colorful birds, especially parrots with their playful personalities and vibrant feathers. Designing a bead parrot gives them the opportunity to create their own imaginative version of this fascinating bird.
The project is enjoyable because children can:
- Choose their favorite shades of green and pink.
- Follow an easy bead pattern.
- Practice careful threading.
- Create a useful handmade accessory.
- Personalize every bird with unique details.
- Share finished parrots as gifts for family and friends.
Every completed parrot becomes a colorful reminder of the child’s creativity and patience.
Materials You’ll Need
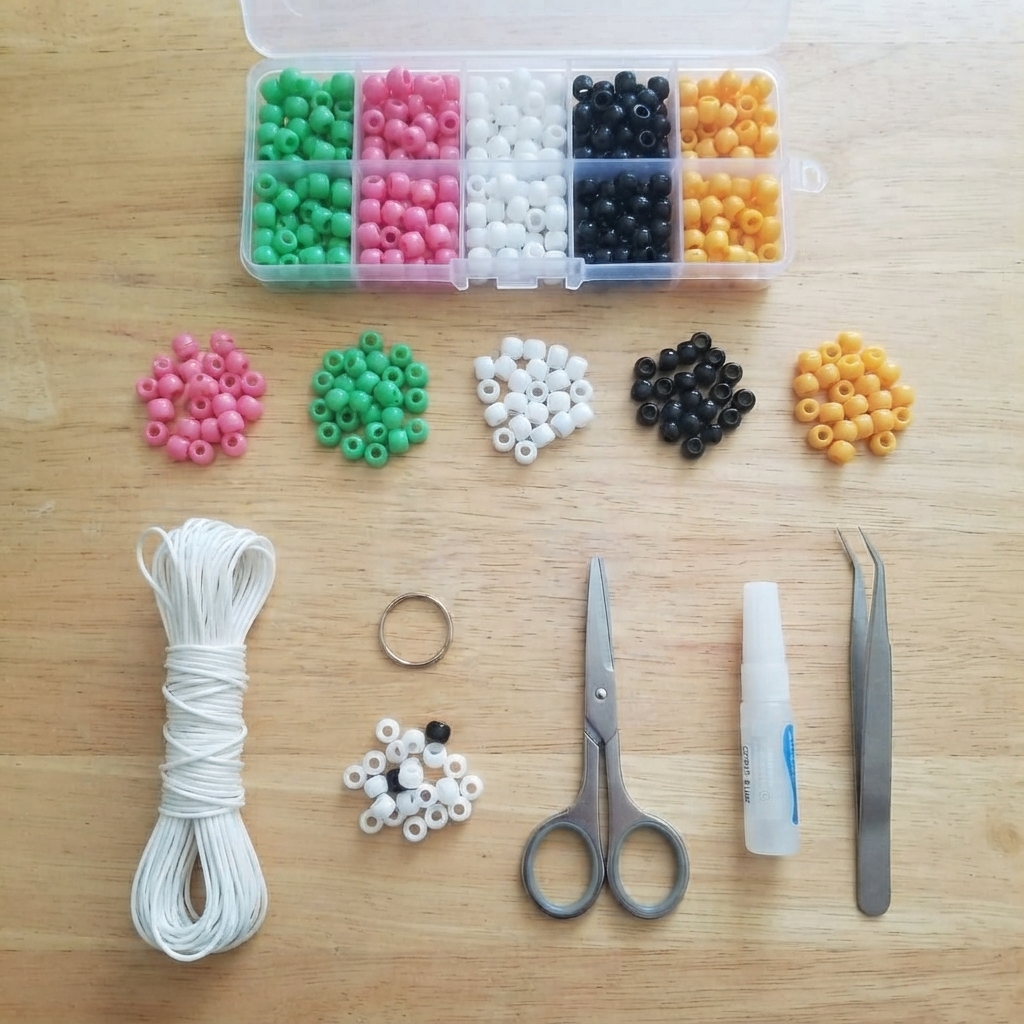
Before starting, gather all the necessary supplies.
- Green pony beads
- Pink pony beads
- White pony beads
- Black pony beads
- Yellow or orange pony bead for the beak
- Plastic lacing cord or nylon craft cord
- Metal key ring (optional)
- Scissors
- Small bead tray
- Tweezers (optional)
- Clear craft glue (optional)
Keeping supplies organized makes the project easier and more enjoyable.
Choosing the Perfect Color Combination
Although this project features green and pink, children can explore different shades to give each parrot its own personality.
Popular combinations include:
- Bright green with light pink
- Lime green with hot pink
- Emerald green with pastel pink
- Mint green with peach pink
- Forest green with rose pink
- Neon green with vibrant pink
- Glitter green with pearl pink
- Soft green with lavender-pink accents
Mixing bead finishes, such as glossy or translucent beads, adds even more visual interest.
Step-by-Step Instructions
Step 1: Prepare the Cord
Cut a length of plastic lacing or nylon cord long enough to complete the design. Leaving extra length makes threading easier and allows room for tying secure knots.
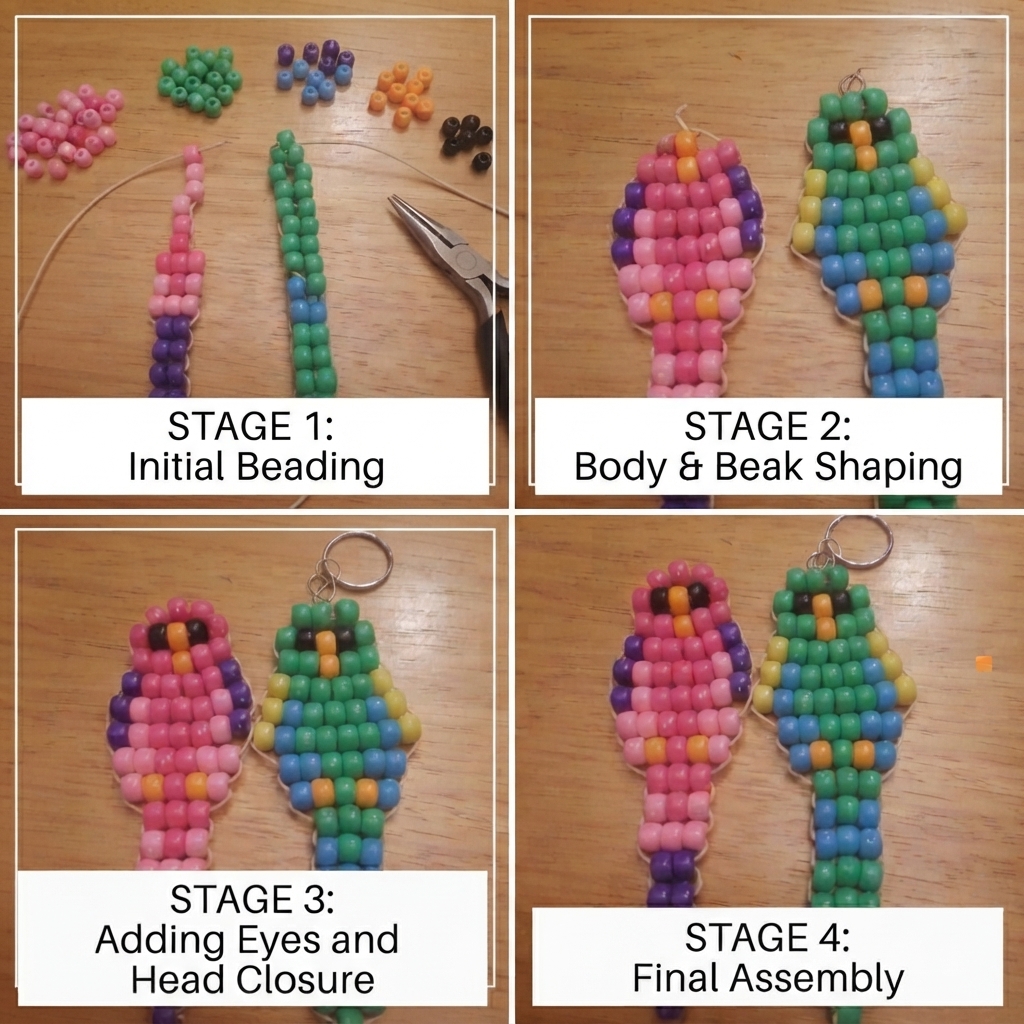
Step 2: Create the Head
Begin with the top of the parrot’s head using green beads.
Add white and black beads to form a bright, expressive eye.
Insert a yellow or orange bead to create the beak.
Step 3: Form the Body
Continue threading green beads to build the rounded body.
Keep each row neat and gently tighten the cord after adding new beads.
The body should appear slightly larger than the head, giving the bird a cute cartoon-like appearance.
Step 4: Add Pink Wings
Use pink beads to create one wing on each side of the body.
Children can experiment with different wing shapes, from small rounded wings to larger decorative feathers.
The pink accents create a striking contrast against the green body.
Step 5: Design the Tail
Create a cheerful tail using alternating green and pink beads.
A longer tail gives the parrot a graceful tropical look, while a shorter tail creates a playful, chubby bird.
Step 6: Finish the Design
Complete the final rows of beads and check that the entire design is balanced.
Adjust any beads that have shifted before tying the cord securely.
Step 7: Attach a Key Ring (Optional)
If you would like to turn the parrot into a keychain, thread the cord through a metal key ring.
Tie several secure knots and trim the excess cord.
For extra durability, apply a tiny drop of clear craft glue to the finished knot.
Educational Benefits
This colorful craft supports many areas of child development.
Fine Motor Skills
Threading small beads strengthens finger muscles and improves dexterity.
Hand-Eye Coordination
Children learn to place beads accurately while following the design.
Pattern Recognition
Repeating bead colors and shapes helps children understand sequencing and symmetry.
Creativity
Every parrot can feature different expressions, colors, and decorative details.
Concentration
Working carefully through each step encourages focus and patience.
Confidence
Completing a detailed project gives children a satisfying sense of achievement.
Creative Ways to Personalize Your Parrot
Once the basic design is complete, children can add unique touches to make their parrot one of a kind.
Ideas include:
- Glitter beads for sparkling feathers
- A tiny flower beside the bird
- A heart-shaped bead on the chest
- Letter beads spelling a name
- Rainbow tail feathers
- Tiny bead feet
- A decorative bow
- Metallic wing accents
- A miniature branch beneath the bird
- Small leaf charms
These additions make every project feel extra special.
Classroom Applications
Teachers can easily include this project in lessons about birds, rainforests, or art.
Students might:
- Learn about tropical parrots.
- Discuss bird habitats.
- Practice color recognition.
- Create classroom displays.
- Exchange handmade gifts.
- Develop pattern-reading skills.
- Build confidence through collaborative crafting.
The project combines science, creativity, and fine motor practice in an engaging way.
Safety Tips
Keep the activity safe and enjoyable by following a few simple guidelines.
- Supervise younger children while handling small beads.
- Keep beads away from infants and toddlers.
- Use child-safe scissors.
- Tie knots securely before using the finished project.
- Store unused beads in containers after crafting.
- Clean the workspace when finished.
Good organization helps children craft safely and independently.
Displaying Finished Creations
The completed parrot can brighten many everyday items.
Popular uses include:
- Backpack charms
- Keychains
- Pencil case decorations
- Bookmarks
- Gift toppers
- Window ornaments
- Classroom displays
- Friendship gifts
- Holiday ornaments
- Decorative mobiles
Children enjoy seeing their colorful birds displayed in creative ways.
Why Handmade Crafts Are Valuable
Craft projects like this help children discover the joy of creating something with their own hands. Instead of simply following instructions, they make artistic decisions that reflect their personality and imagination.
Designing a bead parrot also encourages perseverance, attention to detail, and pride in completing a project. These experiences build confidence and foster a lifelong appreciation for creativity.
Conclusion
Designing a cute little parrot from green and pink beads is a joyful craft that combines colorful creativity with valuable learning opportunities. Using simple materials and an easy-to-follow design, children can create an adorable tropical bird that becomes a keychain, decoration, or treasured handmade gift.
Along the way, they strengthen fine motor skills, improve concentration, practice following patterns, and express their artistic ideas. Whether enjoyed at home, in the classroom, or during a craft workshop, this cheerful parrot project offers an engaging experience that children will remember long after the final bead is placed.
Every finished parrot is unique, proving that a handful of colorful beads and a little imagination can be transformed into something truly delightful.
