
Posted in

How to Sew a Simple Canvas Bag for Beginners: A Step-by-Step Guide

# How to Sew a Simple Canvas Bag for Beginners A Step-by-Step Guide Making your own canvas bag is one of the best beginner sewing projects. It is simple, practical, and helps you learn essential sewing skills such as measuring, cutting, pinning, sewing straight seams, and attaching handles. A handmade canvas bag is not only useful for shopping, carrying books, or organizing everyday items, but it is also reusable, making it an eco-friendly alternative to plastic bags. If you're just starting your sewing journey, this easy project will help you build confidence while creating something you can use every day. ## Why Make a Canvas Bag A canvas bag is an ideal first sewing project because it uses simple shapes and basic sewing techniques. Benefits include Easy for beginners Requires only straight stitches Reusable and environmentally friendly Durable and long-lasting Customizable with colors and decorations Great for practicing sewing skills Makes a thoughtful handmade gift Once you've completed one bag, you'll be able to create many more in different sizes and styles. ## Materials You'll Need Gather these supplies before you begin Canvas fabric (about ½ yard or 50 cm) Matching sewing thread Fabric scissors Measuring tape or ruler Straight pins or sewing clips Fabric marker or tailor's chalk Iron and ironing board Sewing machine or hand-sewing needle Safety pin (optional) Canvas is an excellent fabric for beginners because it is sturdy and easy to sew. ## Step 1 Measure and Cut the Fabric For a basic tote bag, cut 2 rectangles measuring approximately 16 × 18 inches (40 × 45 cm) for the front and back. 2 strips measuring 4 × 24 inches (10 × 60 cm) for the handles. You can adjust the dimensions depending on the size of bag you want. Use sharp fabric scissors to ensure clean, straight edges. ## Step 2 Press the Fabric Iron all fabric pieces before sewing. Pressing removes wrinkles and makes measuring and stitching more accurate. Smooth fabric is easier to work with and produces cleaner results. ## Step 3 Prepare the Handles Fold each handle strip in half lengthwise with the wrong sides together and press. Open the strip, then fold each long edge toward the center crease. Fold the strip in half again to enclose the raw edges. Press once more. Topstitch along both long edges to secure the handle. Repeat for the second handle. ## Step 4 Position the Handles Place one bag panel right side up. Position each handle about 3–4 inches (8–10 cm) from the side edges. Pin the handle ends in place, making sure they are not twisted. Repeat on the second bag panel. ## Step 5 Baste the Handles Sew a short line of stitching across each handle end to hold it securely in place before assembling the bag. This prevents the handles from shifting while sewing. ## Step 6 Sew the Bag Body Place the two fabric panels right sides together. Match all edges carefully and pin around the sides and bottom. Leave the top edge open. Sew along One side The bottom The opposite side Use a seam allowance of about ½ inch (1.3 cm). Backstitch at the beginning and end of each seam. ## Step 7 Reinforce the Corners (Optional) For a sturdier bag with a flat bottom 1. Flatten one bottom corner into a triangle. 2. Measure about 1½ inches (4 cm) from the tip. 3. Draw a straight line. 4. Sew across the line. 5. Trim the excess fabric. Repeat for the other corner. This creates a boxed bottom that allows the bag to stand upright. ## Step 8 Finish the Top Edge Fold the top edge of the bag inward by ½ inch (1.3 cm) and press. Fold it inward again by another 1 inch (2.5 cm) to hide the raw edge. Pin all the way around. Topstitch close to the folded edge. This creates a neat and durable opening. ## Step 9 Reinforce the Handles To make the handles extra strong Sew a square with an X inside at each handle attachment point. This reinforcement helps the bag carry heavier items safely. ## Step 10 Turn the Bag Right Side Out Turn the bag through the open top. Push the corners out gently using your fingers or a blunt tool. Press the finished bag with an iron for a crisp appearance. ## Optional Decorations Once your bag is complete, personalize it with creative details. Ideas include Fabric paint Embroidery Iron-on patches Appliqué designs Decorative buttons Printed fabric labels Lace trim Heat-transfer vinyl These decorations make every bag unique. ## Tips for Beginners Follow these simple tips for better results Measure carefully before cutting. Iron after every major step. Use strong thread for durability. Pin fabric securely before sewing. Sew slowly to maintain straight seams. Practice on scrap fabric if you're new to sewing. Taking your time leads to a more professional finish. ## Common Mistakes to Avoid Many beginners encounter these problems Crooked seams Twisted handles Uneven measurements Forgetting to backstitch Skipping the ironing step Unequal handle placement Double-check your work before sewing each seam. ## Fun Variations Once you've mastered the basic canvas bag, experiment with new designs. Try adding Interior pockets Zipper closures Magnetic snaps Adjustable straps Color-block fabric Lining fabric Exterior pockets Decorative piping Each new feature teaches valuable sewing techniques. ## Caring for Your Canvas Bag Keep your handmade bag looking its best by following these care tips Wash according to the fabric's care instructions. Air dry when possible. Iron if needed. Repair loose stitches promptly. Avoid carrying loads heavier than the fabric can support. Proper care helps your bag last for years. ## Skills You'll Learn This beginner project teaches several essential sewing skills, including Measuring fabric accurately Cutting straight lines Pressing fabric Sewing straight seams Creating hems Attaching handles Reinforcing stress points Finishing raw edges These techniques prepare you for more advanced sewing projects. ## Final Thoughts Sewing a simple canvas bag is an enjoyable and rewarding project for beginners. It introduces the basic techniques of measuring, cutting, sewing straight seams, and attaching handles while producing a practical item you can use every day. With just a few materials and some patience, you'll create a sturdy, reusable bag that reflects your personal style. As your confidence grows, you can customize future bags with pockets, decorative stitching, or unique fabrics, making each project a fun opportunity to expand your sewing skills.

Making your own canvas bag is one of the best beginner sewing projects. It is simple, practical, and helps you learn essential sewing skills such as measuring, cutting, pinning, sewing straight seams, and attaching handles. A handmade canvas bag is not only useful for shopping, carrying books, or organizing everyday items, but it is also reusable, making it an eco-friendly alternative to plastic bags.

If you’re just starting your sewing journey, this easy project will help you build confidence while creating something you can use every day.

Why Make a Canvas Bag?

A canvas bag is an ideal first sewing project because it uses simple shapes and basic sewing techniques.

Benefits include:

  • Easy for beginners
  • Requires only straight stitches
  • Reusable and environmentally friendly
  • Durable and long-lasting
  • Customizable with colors and decorations
  • Great for practicing sewing skills
  • Makes a thoughtful handmade gift

Once you’ve completed one bag, you’ll be able to create many more in different sizes and styles.

Materials You’ll Need
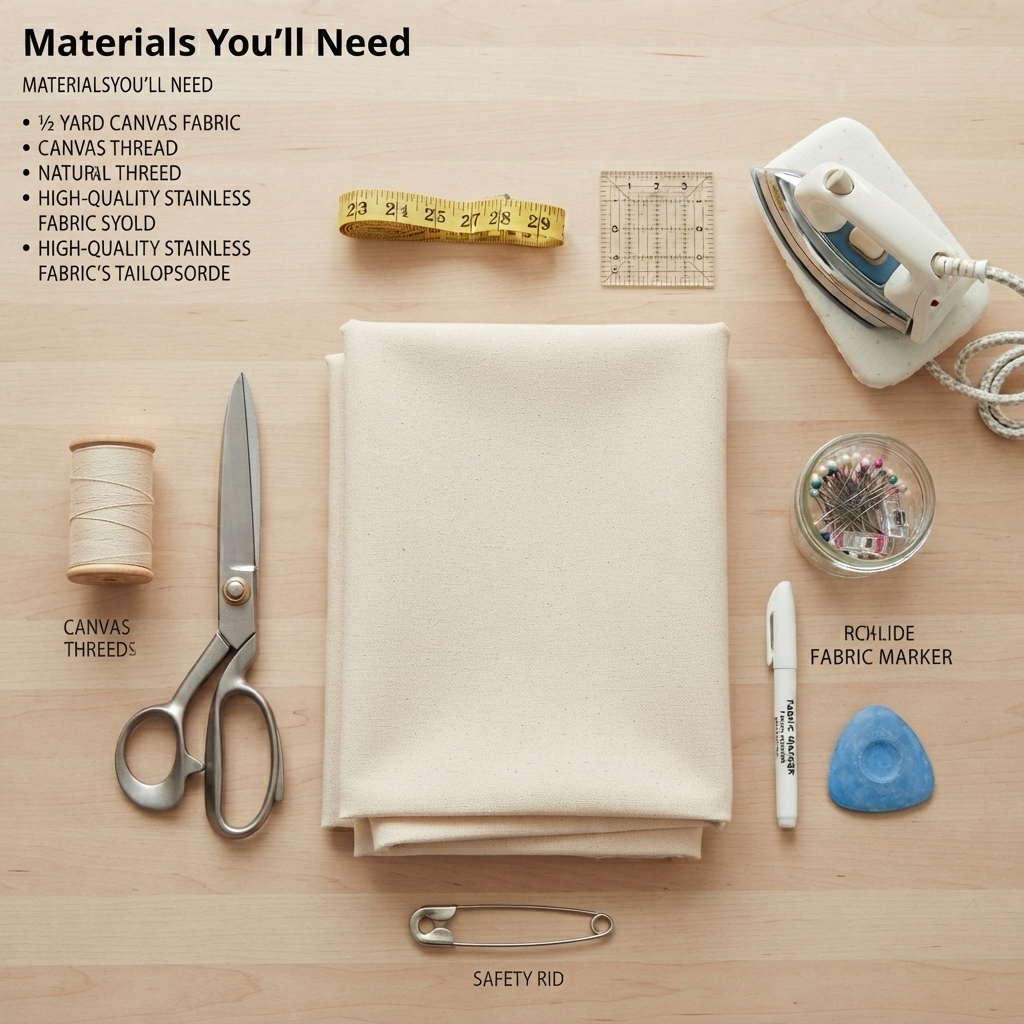
Gather these supplies before you begin:

  • Canvas fabric (about ½ yard or 50 cm)
  • Matching sewing thread
  • Fabric scissors
  • Measuring tape or ruler
  • Straight pins or sewing clips
  • Fabric marker or tailor’s chalk
  • Iron and ironing board
  • Sewing machine or hand-sewing needle
  • Safety pin (optional)

Canvas is an excellent fabric for beginners because it is sturdy and easy to sew.

Step 1: Measure and Cut the Fabric

For a basic tote bag, cut:

  • 2 rectangles measuring approximately 16 × 18 inches (40 × 45 cm) for the front and back.
  • 2 strips measuring 4 × 24 inches (10 × 60 cm) for the handles.

You can adjust the dimensions depending on the size of bag you want.

Use sharp fabric scissors to ensure clean, straight edges.

Step 2: Press the Fabric

Iron all fabric pieces before sewing.

Pressing removes wrinkles and makes measuring and stitching more accurate.

Smooth fabric is easier to work with and produces cleaner results.

Step 3: Prepare the Handles

Fold each handle strip in half lengthwise with the wrong sides together and press.

Open the strip, then fold each long edge toward the center crease.

Fold the strip in half again to enclose the raw edges.

Press once more.

Topstitch along both long edges to secure the handle.

Repeat for the second handle.

Step 4: Position the Handles

Place one bag panel right side up.

Position each handle about 3–4 inches (8–10 cm) from the side edges.

Pin the handle ends in place, making sure they are not twisted.

Repeat on the second bag panel.

Step 5: Baste the Handles

Sew a short line of stitching across each handle end to hold it securely in place before assembling the bag.

This prevents the handles from shifting while sewing.

Step 6: Sew the Bag Body

Place the two fabric panels right sides together.

Match all edges carefully and pin around the sides and bottom.

Leave the top edge open.

Sew along:

  • One side
  • The bottom
  • The opposite side

Use a seam allowance of about ½ inch (1.3 cm).

Backstitch at the beginning and end of each seam.

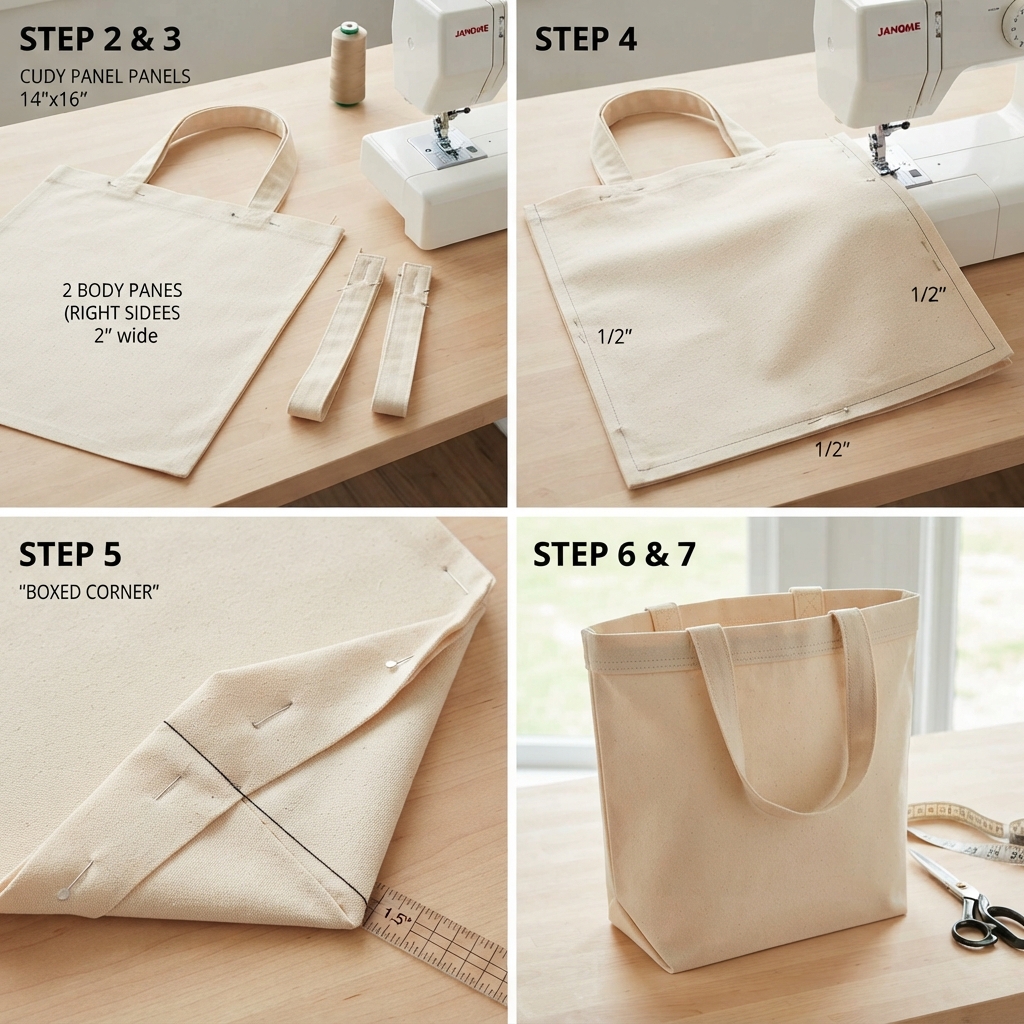
Step 7: Reinforce the Corners (Optional)

For a sturdier bag with a flat bottom:

  1. Flatten one bottom corner into a triangle.
  2. Measure about 1½ inches (4 cm) from the tip.
  3. Draw a straight line.
  4. Sew across the line.
  5. Trim the excess fabric.

Repeat for the other corner.

This creates a boxed bottom that allows the bag to stand upright.

Step 8: Finish the Top Edge

Fold the top edge of the bag inward by ½ inch (1.3 cm) and press.

Fold it inward again by another 1 inch (2.5 cm) to hide the raw edge.

Pin all the way around.

Topstitch close to the folded edge.

This creates a neat and durable opening.

Step 9: Reinforce the Handles

To make the handles extra strong:

Sew a square with an “X” inside at each handle attachment point.

This reinforcement helps the bag carry heavier items safely.

Step 10: Turn the Bag Right Side Out

Turn the bag through the open top.

Push the corners out gently using your fingers or a blunt tool.

Press the finished bag with an iron for a crisp appearance.

Optional Decorations

Once your bag is complete, personalize it with creative details.

Ideas include:

  • Fabric paint
  • Embroidery
  • Iron-on patches
  • Appliqué designs
  • Decorative buttons
  • Printed fabric labels
  • Lace trim
  • Heat-transfer vinyl

These decorations make every bag unique.

Tips for Beginners

Follow these simple tips for better results:

  • Measure carefully before cutting.
  • Iron after every major step.
  • Use strong thread for durability.
  • Pin fabric securely before sewing.
  • Sew slowly to maintain straight seams.
  • Practice on scrap fabric if you’re new to sewing.

Taking your time leads to a more professional finish.

Common Mistakes to Avoid

Many beginners encounter these problems:

  • Crooked seams
  • Twisted handles
  • Uneven measurements
  • Forgetting to backstitch
  • Skipping the ironing step
  • Unequal handle placement

Double-check your work before sewing each seam.

Fun Variations

Once you’ve mastered the basic canvas bag, experiment with new designs.

Try adding:

  • Interior pockets
  • Zipper closures
  • Magnetic snaps
  • Adjustable straps
  • Color-block fabric
  • Lining fabric
  • Exterior pockets
  • Decorative piping

Each new feature teaches valuable sewing techniques.

Caring for Your Canvas Bag

Keep your handmade bag looking its best by following these care tips:

  • Wash according to the fabric’s care instructions.
  • Air dry when possible.
  • Iron if needed.
  • Repair loose stitches promptly.
  • Avoid carrying loads heavier than the fabric can support.

Proper care helps your bag last for years.

Skills You’ll Learn

This beginner project teaches several essential sewing skills, including:

  • Measuring fabric accurately
  • Cutting straight lines
  • Pressing fabric
  • Sewing straight seams
  • Creating hems
  • Attaching handles
  • Reinforcing stress points
  • Finishing raw edges

These techniques prepare you for more advanced sewing projects.

Final Thoughts

Sewing a simple canvas bag is an enjoyable and rewarding project for beginners. It introduces the basic techniques of measuring, cutting, sewing straight seams, and attaching handles while producing a practical item you can use every day. With just a few materials and some patience, you’ll create a sturdy, reusable bag that reflects your personal style. As your confidence grows, you can customize future bags with pockets, decorative stitching, or unique fabrics, making each project a fun opportunity to expand your sewing skills.

Leave a Reply

Your email address will not be published. Required fields are marked *