
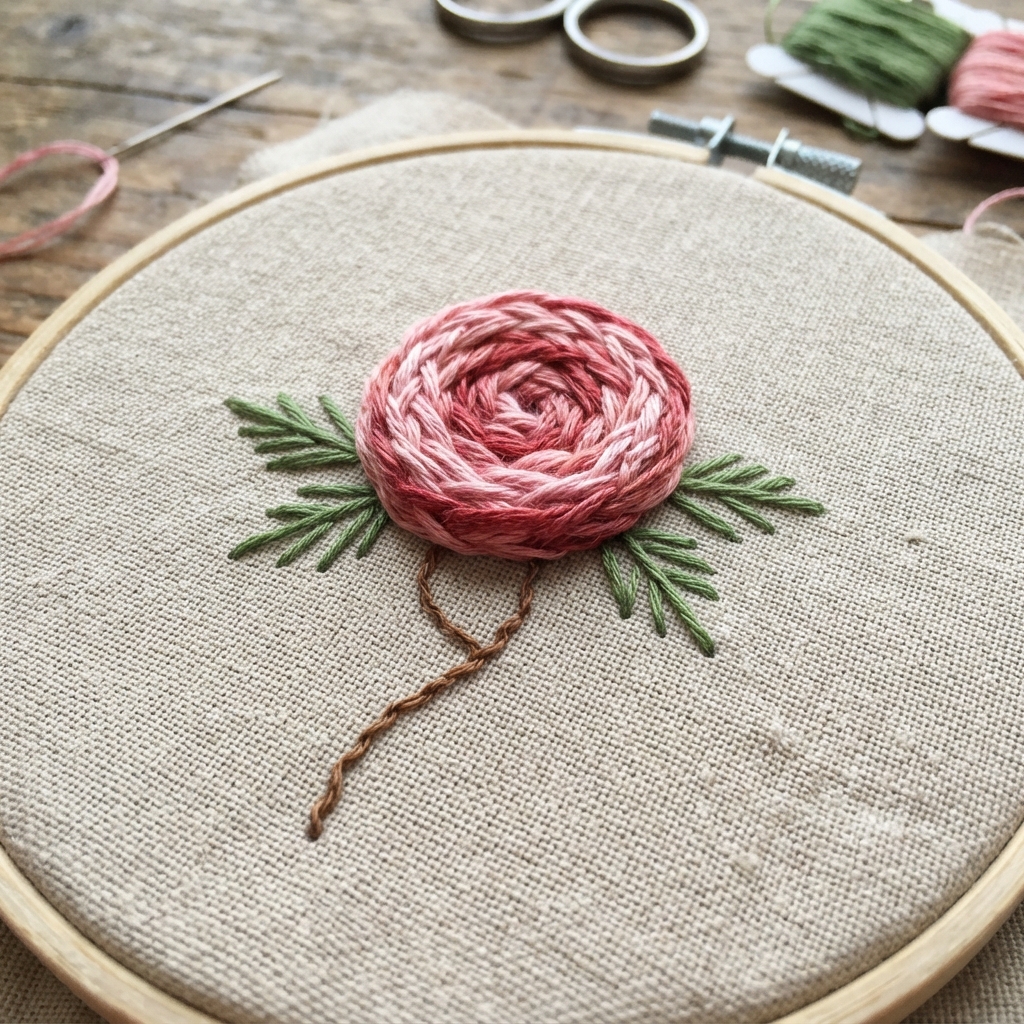
Embroidering a simple rose is a beautiful and enjoyable sewing project for beginners. With a few basic stitches, some colorful embroidery thread, and a piece of fabric, you can create a lovely flower by hand. You do not need expensive tools or advanced sewing skills to get started.
A small embroidered rose can be used to decorate clothing, bags, pillow covers, tablecloths, fabric bookmarks, or handmade gifts. It is also a relaxing craft that allows you to practice different embroidery stitches while creating something beautiful.
Materials You Will Need
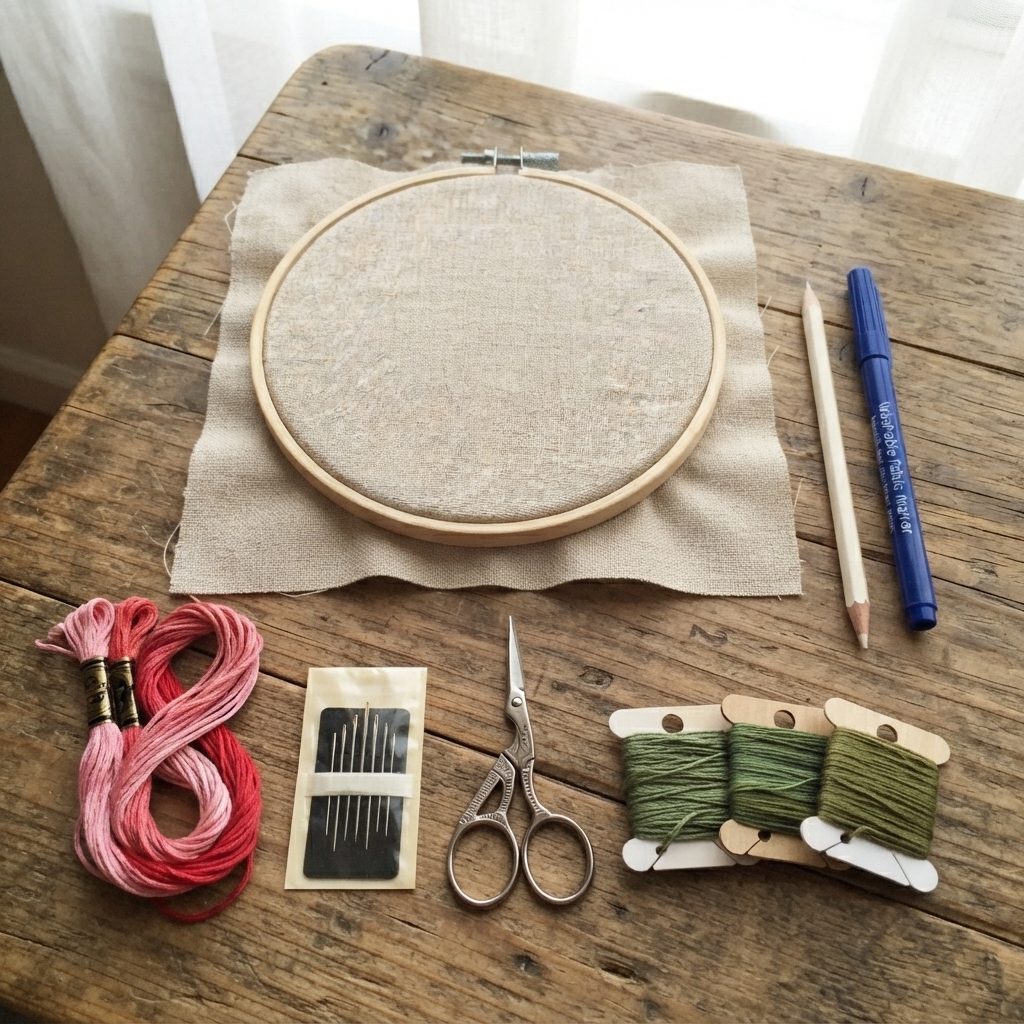
Before starting your embroidered rose, gather a few simple materials:
- A piece of cotton or linen fabric
- Embroidery hoop
- Embroidery needle
- Pink, red, or peach embroidery thread
- Green embroidery thread
- Small scissors
- Pencil or washable fabric marker
- Optional: embroidery floss in a darker shade for details
Choose a light-colored fabric if you want the rose to stand out clearly.
Step 1: Draw a Simple Rose
Place the fabric inside the embroidery hoop and tighten it gently. Use a pencil or washable fabric marker to draw a small rose.
You can make the design very simple. Start with a small spiral in the center for the rosebud. Then draw a few curved lines around it to represent the outer petals.
Do not worry about making the drawing perfect. Handmade embroidery looks charming because every stitch can be slightly different.
Step 2: Prepare Your Thread
Cut a piece of embroidery floss about 30–40 centimeters long. Separate the strands if necessary. For a small beginner project, two or three strands are usually enough.
Thread your needle and make a small knot at the end. Choose pink or red thread for the rose petals and green thread for the stem and leaves.
Step 3: Embroider the Rose Center
Start in the middle of the rose. A simple backstitch is an easy stitch for outlining the spiral.
Bring the needle up through the fabric at the beginning of the spiral. Make a small stitch forward, then bring the needle back up where the previous stitch ended.
Continue following the spiral until you reach the outside. Keep your stitches small and even.
The spiral will begin to look like the center of a rose.
Step 4: Add the Rose Petals
Now it is time to create the petals. You can use satin stitches or small curved stitches to fill the petal shapes.
Bring the needle up on one side of a petal and take it down on the opposite side. Repeat the stitches closely together until the petal is filled.
For a more natural look, use slightly different shades of pink or red. A darker shade can be used near the center, while a lighter shade can be added to the outer petals.
Step 5: Add the Stem
Change to green embroidery thread. Draw a short curved line underneath the rose.
Use a stem stitch or backstitch to sew along the line. Keep the stitches close together to create a smooth-looking stem.
The stem does not need to be perfectly straight. A gentle curve can make the embroidered flower look more natural.
Step 6: Embroider the Leaves
Add one or two simple leaves beside the stem. You can outline each leaf with a backstitch and then fill it with green satin stitches.
Another easy method is to use a fishbone stitch. Start at the pointed end of the leaf and work toward the center. Alternate stitches from each side until the leaf is filled.
For beginners, even a simple outline can look beautiful.
Step 7: Add Small Details
Once the main rose is finished, look at your design and decide whether it needs a few extra details.
You can add:
- Small green leaves
- Tiny flower buds
- Darker stitches around the petals
- A few decorative dots
- Small curved lines on the leaves
Avoid adding too many details at first. A simple design can be very attractive.
Easy Stitches for a Rose
Several basic embroidery stitches work especially well for roses.
Backstitch
The backstitch is excellent for outlines and the center spiral. It creates a clean, continuous line.
Satin Stitch
Satin stitch is useful for filling petals and leaves. Place the stitches close together to create a smooth surface.
Stem Stitch
Stem stitch is perfect for flower stems and curved lines. It gives the stem a soft, natural appearance.
French Knots
French knots can be used as tiny decorative details. They are also useful for adding texture to the center of a flower.
Tips for Beginners
If this is your first embroidery project, start with a small rose. A design about 5–8 centimeters wide is easy to manage.
Keep your thread tension gentle. Pulling the thread too tightly can cause the fabric to wrinkle.
Try to keep your stitches similar in size, but do not worry if they are not perfect. With practice, your stitches will become more consistent.
It is also helpful to practice each stitch on a scrap piece of fabric before working on your final design.
Creative Ways to Use an Embroidered Rose
Once you have learned how to embroider a simple rose, you can use the design on many handmade projects.
Try decorating:
- Tote bags
- Handkerchiefs
- Pillow covers
- Fabric bookmarks
- Pencil cases
- Clothing
- Fabric pouches
- Greeting cards
- Handmade gifts
You can also embroider several small roses together to create a beautiful floral pattern.
Final Thoughts
Learning how to embroider a simple rose with stitches is a wonderful project for anyone who wants to practice hand embroidery. You only need a few basic materials and simple stitches such as backstitch, satin stitch, and stem stitch.
Start with a small design, work slowly, and enjoy the process. Once you become comfortable with the basic stitches, experiment with different colors, petal shapes, and flower sizes. Your simple rose can become the beginning of many beautiful handmade embroidery projects.
