

Beaded crafts are a wonderful way for children to explore colors, patterns, and creativity. Making a beaded dolphin and a beaded butterfly is a fun project that can be enjoyed at home, in the classroom, or during a children’s craft session.
With colorful pony beads, craft cord, and simple patterns, children can create two charming designs inspired by nature: a playful ocean dolphin and a beautiful butterfly. These crafts also help children practice counting, concentration, hand-eye coordination, and fine motor skills.
Why Make Beaded Animals?
Bead crafts are enjoyable, but they can also support children’s learning and development.
While making a dolphin and butterfly, children can practice:
- Fine motor skills
- Hand-eye coordination
- Counting
- Color recognition
- Pattern following
- Concentration
- Patience
- Creativity
Children can also learn about dolphins, butterflies, oceans, gardens, and nature while creating their bead designs.
Materials You Will Need
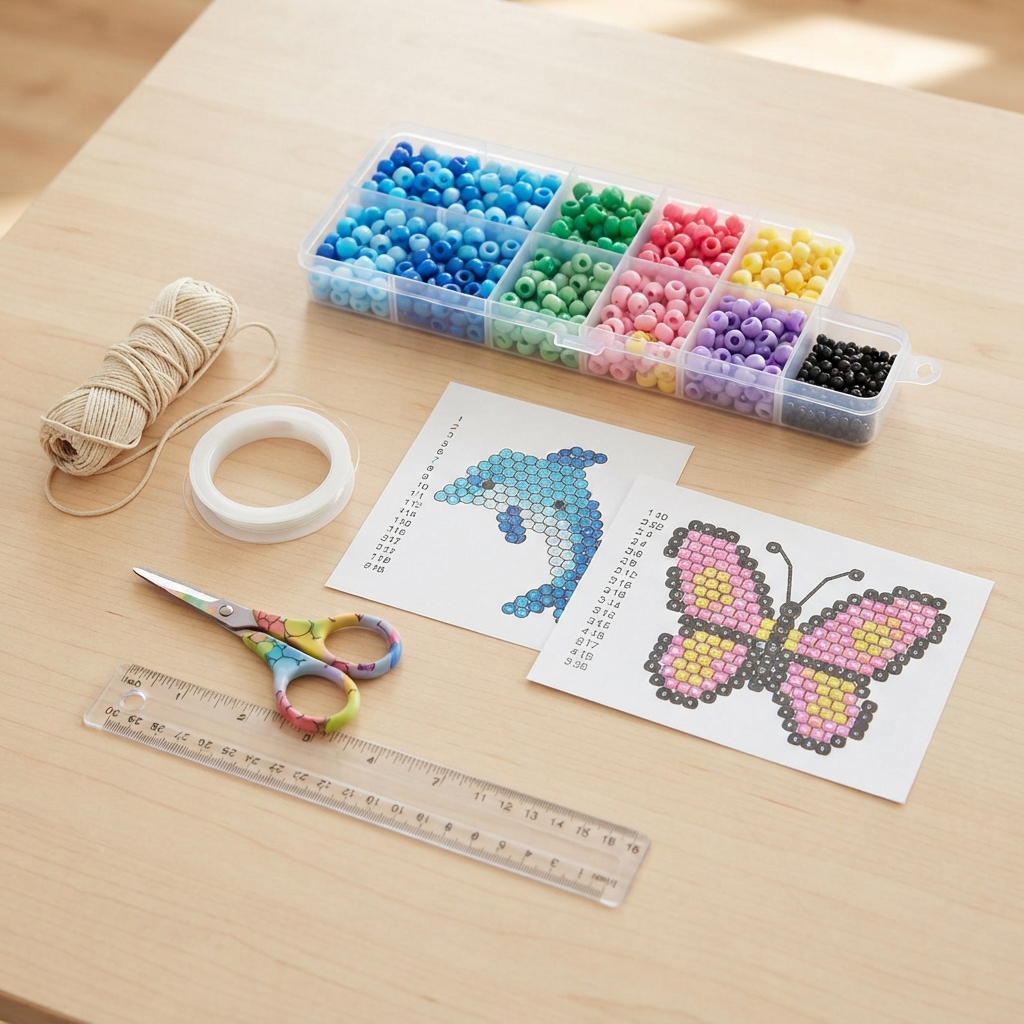
For both projects, prepare:
- Colorful pony beads
- Blue beads for the dolphin
- Green, pink, yellow, or purple beads for the butterfly
- Black beads for small details
- Craft cord or suitable beading string
- Scissors
- A ruler
- Simple dolphin and butterfly bead patterns
Pony beads are a good choice for beginners because their larger holes are relatively easy to thread.
Safety note: Small beads and cords can be choking hazards. Young children should always be supervised by an adult, and loose beads should be kept away from very young children.
Part 1: Making a Beaded Dolphin
The dolphin is a fun ocean-themed project that allows children to experiment with shades of blue and other colors.
Step 1: Choose Dolphin Colors
For a traditional-looking dolphin, choose:
- Dark blue
- Light blue
- Gray
- White
- Black
Children can also make a rainbow dolphin using several bright colors.
Step 2: Prepare the Cord
Cut a suitable length of beading cord.
Leave enough extra cord at both ends to secure the finished design.
Sort the beads into small groups by color before beginning.
This makes it easier to follow the pattern.
Step 3: Create the Dolphin’s Body
Start with the main body of the dolphin.
Thread the beads according to your chosen pattern.
Build the body gradually so that it develops a curved shape.
Keep the beads organized as you work.
Avoid pulling the cord too tightly because the dolphin needs some flexibility.
Step 4: Add the Head
Continue the pattern to form the dolphin’s head.
The head should become narrower toward the snout.
Add a few lighter beads underneath if you want to create a contrasting belly.
Step 5: Add the Eye
Use a small black bead to create the eye.
Position it carefully on the side of the head.
A contrasting bead can make the eye easier to see.
Step 6: Create the Fins
Add beads to form the two side fins.
Try to keep the fins similar in size.
You can use the same color as the body or choose contrasting colors.
Step 7: Add the Dorsal Fin
Create the fin on top of the dolphin using a small group of beads.
Make sure it is firmly connected to the body.
Step 8: Make the Tail
Finish the dolphin with its characteristic tail.
Create two small sections of beads for the tail flukes.
Try to make both sides similar.
Step 9: Secure the Dolphin
When the design is finished, tie the cord securely.
Trim the excess cord carefully.
An adult should check the knot to make sure the beads are secure.
Part 2: Making a Beaded Butterfly
The butterfly is a colorful project that lets children experiment with bright and contrasting colors.
Step 1: Choose Butterfly Colors
Butterflies can be made in almost any color.
Try combinations such as:
- Pink and purple
- Blue and yellow
- Orange and red
- Green and turquoise
- Rainbow colors
Use black or dark beads for the body.
Step 2: Prepare the Cord
Cut a suitable length of craft cord.
Organize the beads by color before starting.
Place the darker beads for the body in one group and the colorful beads for the wings in separate groups.
Step 3: Create the Butterfly’s Body
Start by threading the beads that form the butterfly’s body.
Use dark-colored beads for a simple butterfly shape.
Keep the body straight and make sure the beads are arranged evenly.
Step 4: Create the Wings
The wings are the most colorful part of the project.
Add beads to form the upper and lower wings.
Try to make the left and right sides symmetrical.
Children can use matching colors on both sides or create a rainbow pattern.
For example, the upper wings can be pink and purple while the lower wings can be yellow and orange.
Step 5: Add the Antennae
Use a small amount of cord or a few beads to create the butterfly’s antennae.
Secure them carefully.
The antennae can be simple and short for a beginner-friendly design.
Step 6: Add Decorative Patterns
Children can decorate the butterfly wings with:
- Spots
- Stripes
- Hearts
- Stars
- Contrasting colors
- Rainbow patterns
Encourage children to create their own wing designs.
Step 7: Secure the Butterfly
Tie the ends of the cord securely.
Trim any excess cord.
Check the finished butterfly carefully to make sure all parts are firmly attached.
Make a Dolphin and Butterfly Collection
After completing the two projects, children can make several versions.
Create:
- A blue dolphin
- A rainbow dolphin
- A pink butterfly
- A purple butterfly
- A yellow butterfly
- A multicolored butterfly
The finished pieces can be displayed together as a colorful nature collection.
Turn Them Into Keychains
Both the dolphin and butterfly can be turned into small charms.
Attach a suitable keychain ring or clip to a secure point.
They can decorate:
- Backpacks
- Pencil cases
- School bags
- Craft bags
Always check the attachment carefully before using the finished item.
Create an Ocean and Garden Display
Children can combine both crafts into a larger art project.
Create a blue paper background for the dolphin.
Add:
- Waves
- Fish
- Seaweed
- Bubbles
Then create a garden section for the butterfly.
Add:
- Flowers
- Leaves
- Grass
- Clouds
- Sunshine
The dolphin and butterfly can become part of a colorful nature scene.
Learning Activities With Beads
These crafts can also be used for simple educational activities.
Ask children to:
- Count the beads used in each design.
- Identify the colors.
- Compare the dolphin and butterfly shapes.
- Find symmetrical parts of the butterfly.
- Talk about where dolphins live.
- Talk about where butterflies live.
This makes the craft a combination of art, nature, mathematics, and observation.
Tips for Young Beginners
Use larger beads that are easier to handle.
Sort the beads by color before starting.
Follow one section of the pattern at a time.
Count the beads carefully.
Avoid pulling the cord too tightly.
Check the shape as you work.
Ask an adult for help with cutting and tying the cord.
Let children choose their own colors and designs.
The finished project does not need to be perfect. The most important part is enjoying the creative process.
Common Mistakes to Avoid
Losing Track of the Pattern
Keep the pattern nearby and check each row before moving on.
Pulling the Cord Too Tightly
Too much tension can distort the design.
Making Uneven Butterfly Wings
Compare both sides regularly to keep the wings balanced.
Forgetting the Dolphin’s Tail
Check that both tail sections are included before finishing.
Leaving the Knot Loose
A loose knot can cause beads to fall off.
Secure the ends carefully.
A Great Classroom Craft
Making beaded dolphins and butterflies can be an excellent classroom activity.
The dolphin can be connected to lessons about oceans and marine animals, while the butterfly can introduce children to insects, gardens, and life cycles.
Teachers can also create a display where every child contributes a different beaded animal.
Handmade Gift Ideas
A beaded dolphin or butterfly can make a lovely handmade gift.
Children can choose colors based on a friend’s favorite colors.
They can also create a small card explaining why they chose the particular design.
This makes the craft more personal and meaningful.
Conclusion
Making a beaded dolphin and a beaded butterfly is a fun project that combines creativity, learning, and simple beadwork. Children can practice fine motor skills, counting, color recognition, symmetry, concentration, and pattern following while creating colorful designs.
The dolphin brings an ocean theme to the activity, while the butterfly adds a beautiful garden-inspired touch. Once children learn the basic techniques, they can experiment with rainbow colors, different patterns, keychains, and larger nature-themed displays.
Always supervise young children when using small beads and craft cords. With safe materials, simple patterns, and plenty of imagination, these two beaded animals can provide a fun and rewarding creative activity.
