
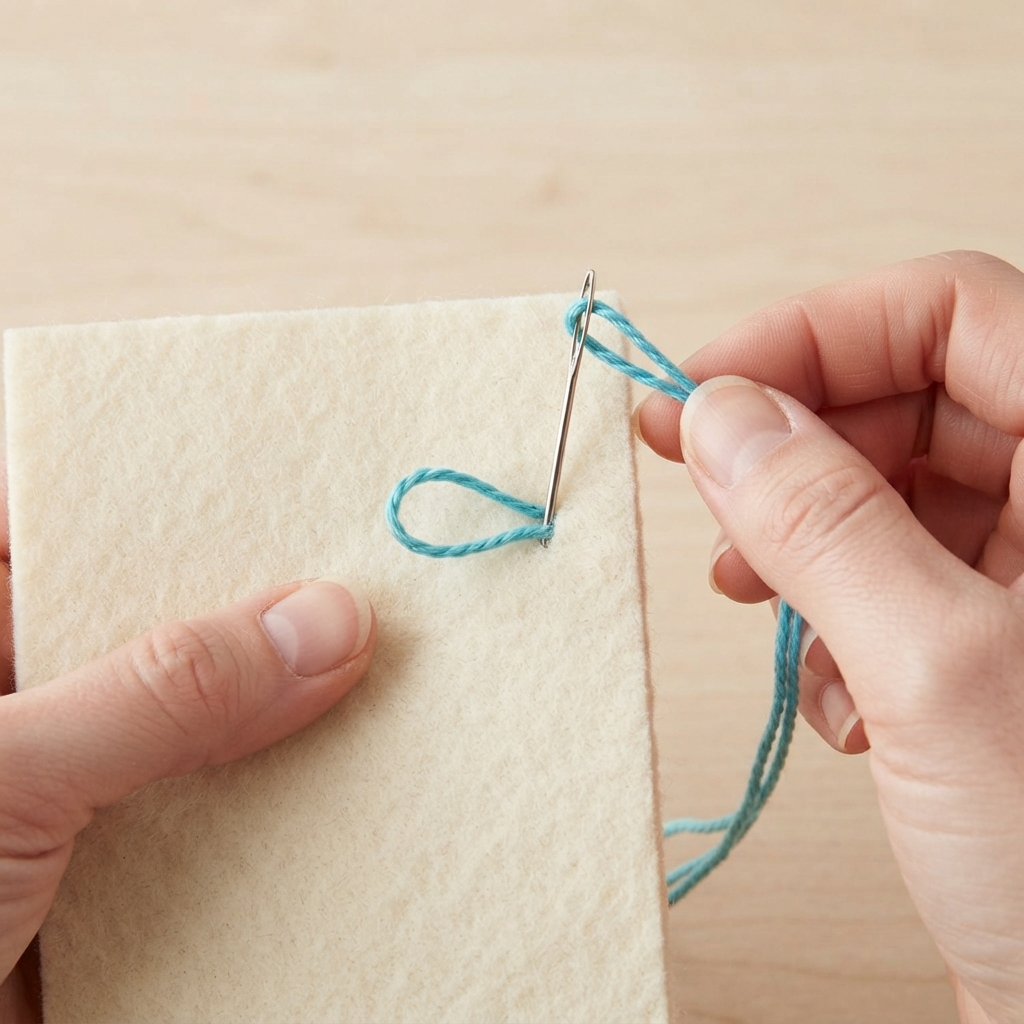
The blanket stitch is one of the most decorative and practical hand-sewing stitches you can learn. Originally developed to reinforce the edges of blankets, this versatile stitch is now widely used for finishing fabric edges, creating beautiful embroidery, making felt crafts, and adding decorative borders to handmade projects. Its neat, looped appearance not only prevents fabric from fraying but also gives projects a charming handmade look.
Whether you’re new to sewing or looking to expand your hand-stitching skills, learning the blanket stitch is an excellent next step. This guide explains everything beginners need to know, from the tools you’ll need to step-by-step instructions and creative project ideas.
What Is the Blanket Stitch?
The blanket stitch is a decorative hand stitch worked along the edge of fabric. Unlike simple stitches that pass straight through the material, the blanket stitch forms small loops that wrap around the fabric edge, creating a strong and attractive finish.
Although it was originally used on wool blankets, today it is commonly seen on felt crafts, appliqué projects, embroidery, and decorative sewing.
Why Learn the Blanket Stitch?
The blanket stitch is popular because it combines strength with beauty.
Its advantages include:
- Prevents fabric edges from fraying
- Creates an attractive decorative border
- Easy for beginners to learn
- Suitable for both functional and decorative sewing
- Works well on many different fabrics
- Ideal for hand-sewn craft projects
Once mastered, it becomes one of the most useful stitches in your sewing toolkit.
Tools You’ll Need
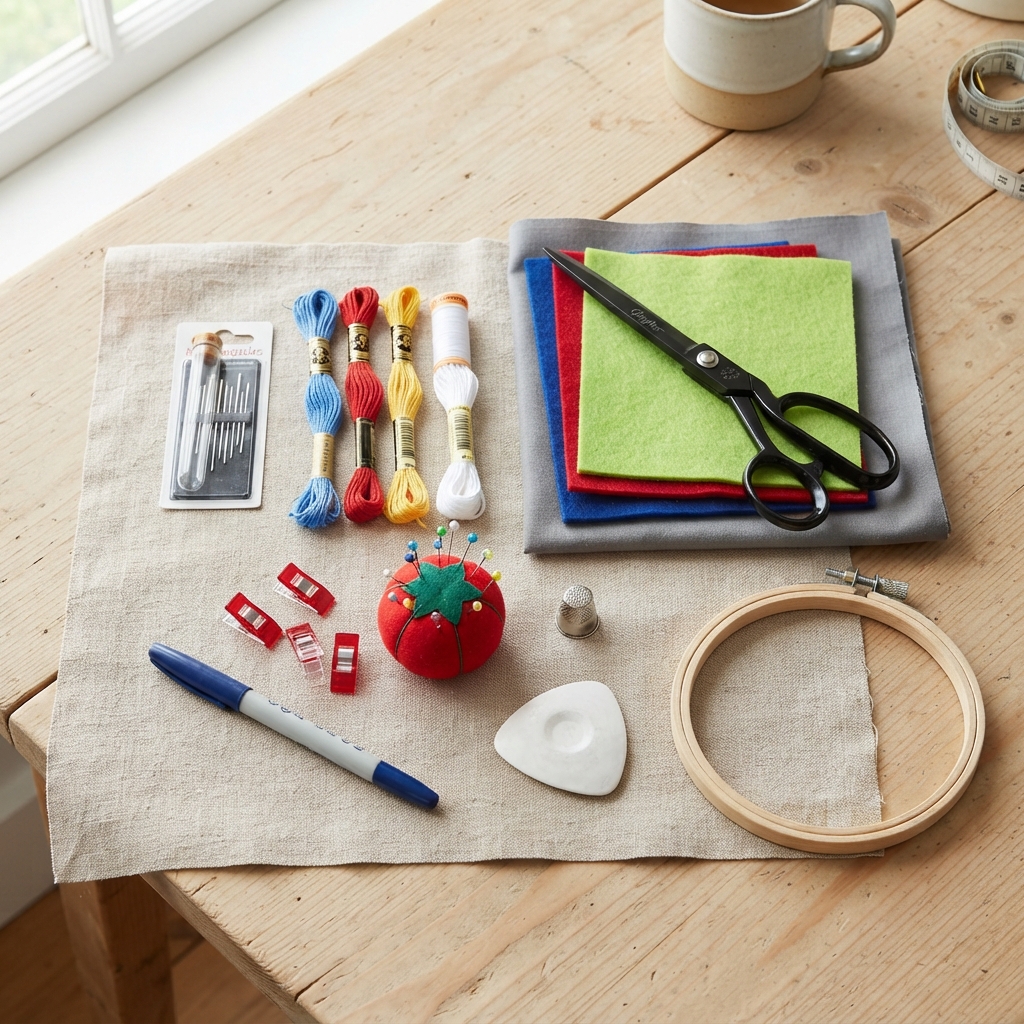
Before you begin, gather these basic sewing supplies:
- Hand sewing needle
- Cotton, polyester, or embroidery thread
- Practice fabric or felt
- Fabric scissors
- Straight pins or sewing clips
- Fabric marker or tailor’s chalk
- Thimble (optional)
- Embroidery hoop (optional for embroidery projects)
Felt is an excellent fabric for beginners because it does not fray easily and clearly shows each stitch.
Choosing the Right Needle and Thread
For most beginner projects:
- Use a medium-sized embroidery or hand sewing needle.
- Choose smooth thread that matches or contrasts with the fabric.
- Embroidery floss creates bold decorative stitches.
- Regular sewing thread produces finer, more delicate results.
Thread color can dramatically change the appearance of your finished project.
Preparing Your Fabric
Before sewing:
- Cut your fabric into a simple square or rectangle.
- Trim the edges neatly.
- Press woven fabric with an iron if necessary.
- Mark an even stitching line if you are practicing.
Good preparation helps produce neat, evenly spaced stitches.
Step 1: Thread the Needle
Cut a piece of thread about 18–24 inches (45–60 cm) long.
Thread the needle and tie a knot at one end.
Using shorter thread helps prevent tangles while sewing.
Step 2: Start the Stitch
Bring the needle up through the fabric from the back, close to the edge.
Pull the thread until the knot rests against the wrong side of the fabric.
This creates the starting point for your blanket stitch.
Step 3: Make the First Blanket Stitch
Insert the needle from the back toward the front a short distance along the fabric edge.
Before pulling the thread tight, pass the needle through the loop of thread.
Gently pull the thread until the loop rests neatly along the edge of the fabric.
This loop forms the characteristic blanket stitch.
Step 4: Continue Stitching
Repeat the same process:
- Insert the needle evenly along the edge.
- Pass the needle through the thread loop.
- Pull gently until the loop sits neatly against the fabric edge.
Keep your stitches evenly spaced for the best appearance.
Step 5: Maintain Even Stitch Length
Consistent stitches create a neat, professional finish.
Try to keep:
- Stitch length equal
- Spacing uniform
- Thread tension even
- Loops aligned along the fabric edge
Practice improves both speed and accuracy.
Step 6: Finish the Stitch
When you reach the end of the fabric:
- Sew one final stitch.
- Pass the needle through the last loop.
- Tie a secure knot on the back.
- Trim the excess thread.
Your blanket stitch is now complete.
Common Uses of the Blanket Stitch
The blanket stitch is one of the most versatile hand stitches.
It is commonly used for:
Finishing Blanket Edges
This is the stitch’s traditional purpose.
It reinforces thick blanket edges while creating an attractive decorative border.
Felt Crafts
Because felt does not fray, blanket stitches add decorative detail while joining pieces together.
Popular felt projects include:
- Plush toys
- Keychains
- Holiday ornaments
- Coasters
- Bookmarks
Appliqué
Blanket stitches securely attach decorative fabric shapes to another fabric surface.
They create a clean, decorative outline around appliqué pieces.
Embroidery
Many embroidery designs use blanket stitches as decorative borders or floral accents.
The stitch adds texture and visual interest.
Pillow Covers
Decorative blanket stitching gives handmade cushions a charming, handcrafted appearance.
Bags and Pouches
Handmade fabric bags often feature blanket stitching around the edges for both strength and decoration.
Children’s Sewing Projects
The blanket stitch is simple enough for older children learning basic hand sewing.
Its repetitive motion helps develop sewing skills and hand coordination.
Fabrics That Work Best
The blanket stitch works well on many materials.
Excellent choices include:
- Felt
- Fleece
- Wool
- Cotton
- Linen
- Canvas
- Denim
Very lightweight fabrics may require smaller stitches and finer thread.
Tips for Beautiful Blanket Stitches
Improve your stitching with these helpful suggestions:
- Use sharp needles.
- Work slowly.
- Practice on scrap fabric first.
- Keep stitches evenly spaced.
- Avoid pulling the thread too tightly.
- Choose thread that complements your fabric.
- Press finished projects if appropriate.
Small improvements quickly lead to more professional-looking results.
Common Beginner Mistakes
Watch out for these common errors:
Uneven Stitch Spacing
Irregular spacing makes the border look untidy.
Tight Thread Tension
Pulling the thread too firmly can distort the fabric.
Loose Loops
Loops should rest neatly against the edge without hanging loosely.
Crooked Stitch Line
Marking a guide line can help beginners maintain consistency.
Using Thread That Is Too Long
Long thread is more likely to knot and twist.
Easy Beginner Projects
Once you’ve mastered the blanket stitch, try these simple projects:
- Felt heart ornaments
- Christmas decorations
- Fabric bookmarks
- Baby blankets
- Pillow covers
- Coin purses
- Glasses cases
- Small storage pouches
- Decorative wall hangings
Each project helps reinforce your stitching skills while creating something useful.
Caring for Blanket-Stitched Projects
To keep your handmade items looking their best:
- Wash according to the fabric’s care instructions.
- Avoid excessive pulling on decorative edges.
- Press gently if needed.
- Repair loose stitches promptly.
Proper care helps preserve both the stitches and the fabric.
Final Thoughts
Learning the blanket stitch is an enjoyable way to expand your hand-sewing skills. Combining strength with decorative appeal, this versatile stitch is perfect for finishing fabric edges, joining felt pieces, embellishing appliqué designs, and creating beautiful handmade crafts. With just a needle, thread, and a little patience, beginners can quickly master the blanket stitch and use it in countless creative projects. As you continue practicing, your stitches will become more even, your confidence will grow, and you’ll discover endless ways to add a professional handmade touch to your sewing creations.
