
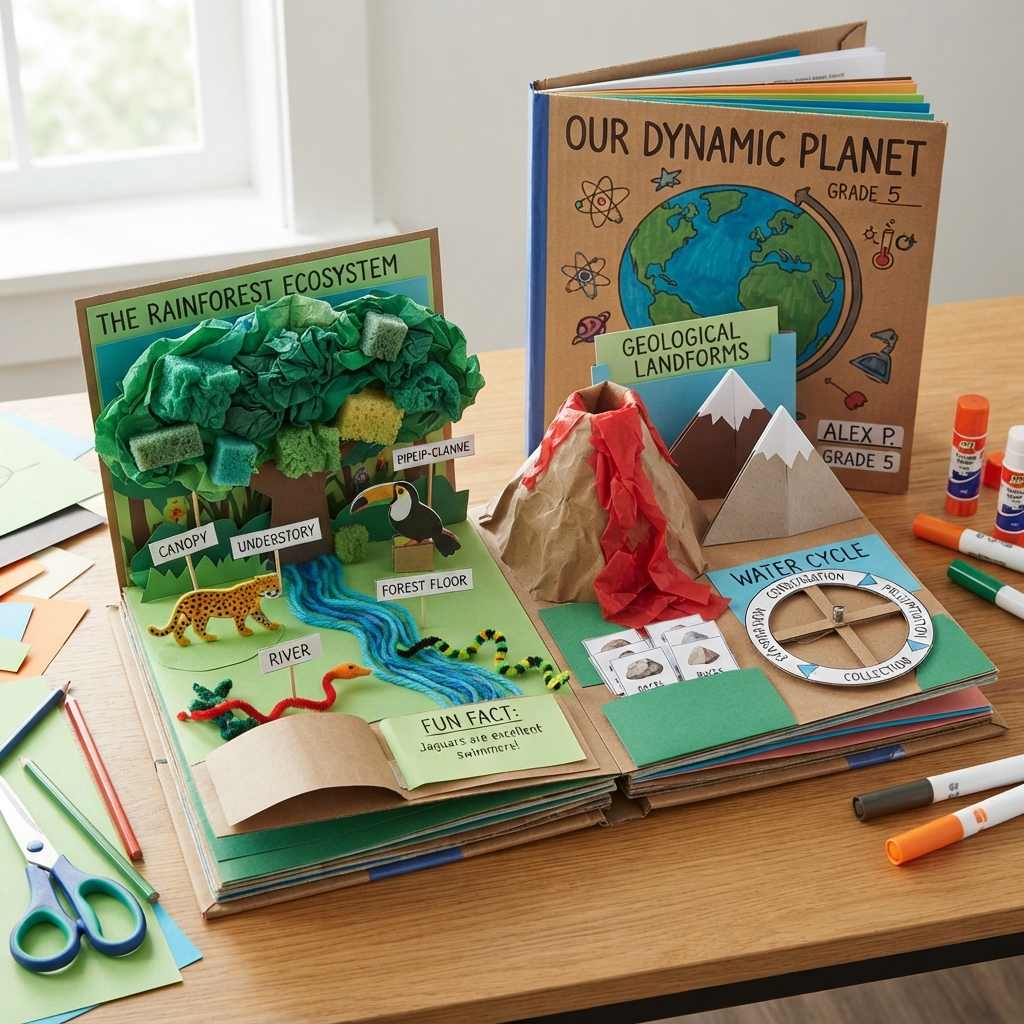
A 3D school textbook is a creative educational model that transforms the traditional idea of a textbook into an interactive three-dimensional learning object. Instead of presenting information only through flat pages, a 3D textbook can include raised pictures, foldable pages, miniature objects, movable pieces, pop-up elements, and different layers that make lessons more visual and engaging. It can be created as a school craft project using cardboard, paper, glue, colored pencils, markers, and recycled materials.
The main purpose of a 3D school textbook is to make learning more active. Students can see, touch, arrange, and explore different parts of the model. This approach can be particularly useful for children who enjoy hands-on activities. It can also help teachers explain subjects that are difficult to understand through ordinary pictures alone.
The Concept of a 3D Textbook
A traditional textbook usually contains printed words, diagrams, photographs, exercises, and illustrations. A 3D textbook adds another dimension to this learning experience.
For example, a science textbook model about the solar system could contain raised planets attached to pages. A biology textbook could include a three-dimensional flower, leaf, or human-body model. A geography textbook could feature a raised map with mountains, rivers, and cities.
The design depends on the subject and the age of the students. A young learner might create a simple alphabet or numbers book, while an older student could design a detailed science, history, geography, or mathematics textbook.
Materials for Making a 3D School Textbook
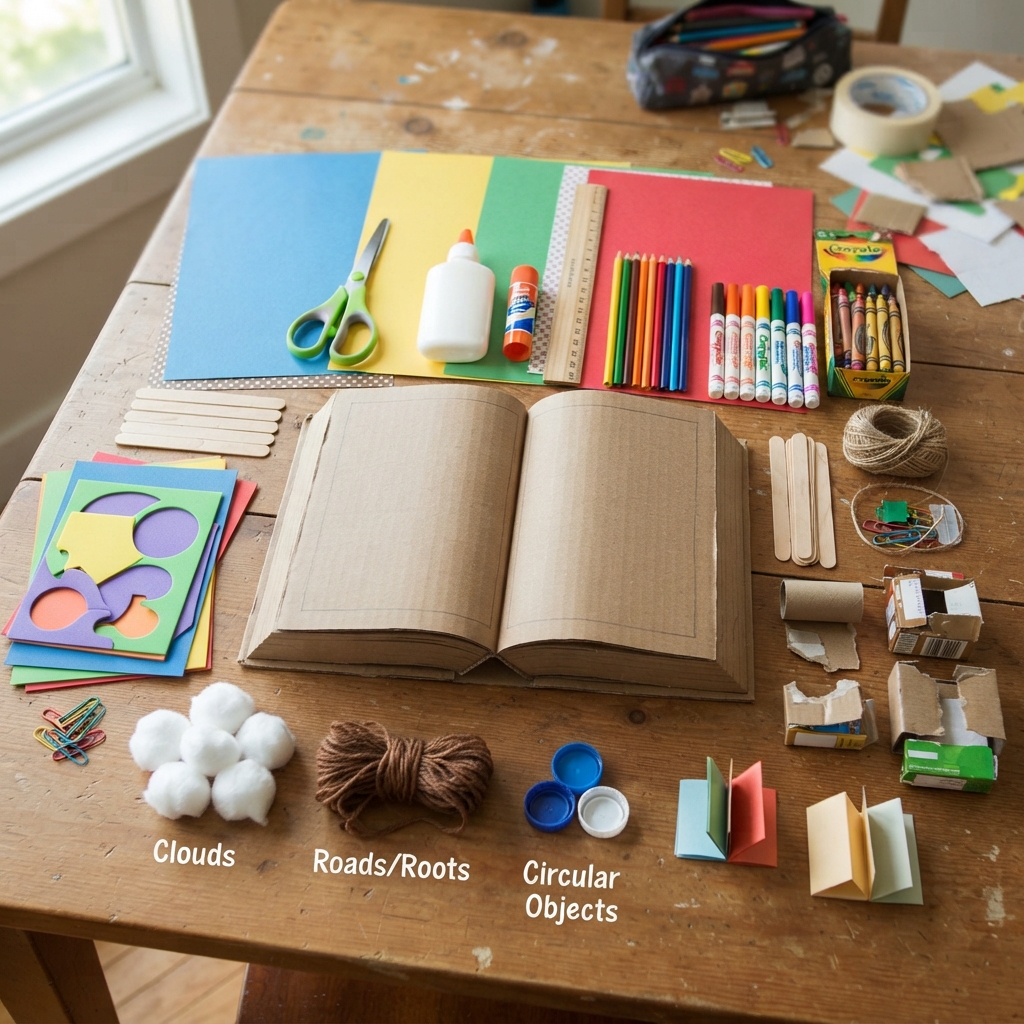
The project can be made from inexpensive and easily available materials. Thick cardboard is useful for the cover and pages because it provides strength. Colored paper can be used for backgrounds, labels, and illustrations.
Other useful materials include scissors, glue, a ruler, pencils, markers, crayons, craft sticks, string, foam sheets, paper clips, and recycled packaging.
Small pieces of cardboard can create raised structures, while folded paper can form pop-up elements. Cotton can represent clouds, yarn can represent roads or plant roots, and bottle caps can become small circular objects.
Using recycled materials also makes the project environmentally friendly.
Planning the Textbook
Good planning is essential before construction begins. Students should first decide on a subject and a theme.
For example, the textbook might focus on animals, space, plants, the human body, mathematics, transportation, or the environment.
After choosing the subject, students can decide how many pages the textbook will contain. Each page should have a clear purpose.
A simple design might include a cover, introduction page, three or four educational pages, an activity page, and a conclusion page.
Students can draw rough sketches of each page before cutting any materials. This prevents overcrowding and makes the final model easier to assemble.
Creating the Cover
The cover is the first part of the textbook that people see. It should clearly communicate the subject.
A large title can be placed in the center. For example, a science-themed textbook could be called “Discover Our Amazing Planet.”
The cover can include raised decorations related to the subject. A space book might have a small paper rocket and raised stars. A nature book could feature paper leaves and flowers.
The student’s name, class, and school can also be included if the project is being prepared for a school assignment.
Making the Pages
The pages can be made from rectangular pieces of thick paper or cardboard. Several pieces can be connected along one side using tape, string, or a simple cardboard binding.
Each page should be strong enough to hold its 3D elements. If a page becomes too heavy, additional cardboard can be attached to the back.
The pages should also be designed so they can open and close without damaging the decorations.
Pop-Up Elements
Pop-up designs are one of the most exciting features of a 3D textbook. A simple folded strip of paper can support a picture that rises when the page opens.
For example, a page about the solar system could contain a pop-up rocket. A history page could show a raised building. A biology page could feature a three-dimensional flower.
Pop-up elements teach students about balance and paper engineering. They also make the textbook interactive.
Raised Pictures
Another easy technique is to create raised pictures. Instead of gluing an image directly onto the page, students can attach small pieces of folded cardboard behind it.
This creates a layered effect. Mountains can appear behind rivers, trees can stand above the ground, and planets can appear to float above a space background.
Different heights can be used to create depth. This makes a flat page look more like a miniature scene.
A 3D Science Page
Science is one of the best subjects for a three-dimensional textbook. Students can choose topics such as the solar system, plants, animals, weather, or the human body.
For a plant lesson, the page could include a raised flower with separate labels for the roots, stem, leaves, and petals.
A solar-system page could show the Sun and planets as layered circles. Each planet could have a label and a short fact.
The 3D format helps students connect scientific vocabulary with visual objects.
A 3D Geography Page
Geography can also be represented effectively in three dimensions. Students can create a miniature map using cardboard layers.
Mountains can be made from folded paper or stacked cardboard. Rivers can be represented with blue paper or yarn. Forests can contain small paper trees.
A map legend can explain the different symbols.
This type of model allows students to understand geographical features more clearly because they can see differences in height and location.
A 3D Mathematics Page
A mathematics textbook can include three-dimensional shapes such as cubes, pyramids, cylinders, cones, and spheres.
Students can create these shapes from paper and attach them to a page. Each shape can have its name and important properties.
The page could also include simple exercises. For example, students might count the number of faces, edges, or corners on a shape.
This transforms an abstract mathematics lesson into something concrete and visual.
A 3D History Page
History lessons can become more engaging through miniature scenes.
A page about an ancient civilization could include a small pyramid, temple, house, or historical object. Students can use cardboard and paper to construct the structures.
A timeline can run along the bottom of the page, with important events represented by small illustrations.
The goal is not to create a perfect historical reconstruction. Instead, the model should help students organize information and understand the relationship between different events.
Interactive Features
A 3D textbook can contain more than raised objects. It can also include interactive elements.
Small flaps can hide information underneath. Students can lift the flap to discover an answer or fact.
Rotating wheels can show vocabulary, numbers, or different stages of a process. Pull tabs can move paper figures across a page.
Pockets can hold small cards containing questions and answers.
These features turn the textbook into an educational game.
Adding Labels and Information
A 3D model should remain educational, not simply decorative. Labels help students understand what each object represents.
For example, a plant model could have labels for “root,” “stem,” “leaf,” and “flower.” A map could identify countries, cities, rivers, and mountains.
Short explanations should be used instead of long paragraphs. The goal is to make information easy to read and connect with the 3D objects.
Using Color Effectively
Color can make the textbook attractive and easier to understand. Different colors can be used to separate sections or highlight important information.
However, students should avoid using too many unrelated colors. A simple color scheme often produces a cleaner result.
Color can also have an educational purpose. For example, blue might represent water, green might represent vegetation, and brown might represent land.
Educational Benefits
A 3D school textbook provides many educational benefits. First, it encourages active learning. Students do not simply read information; they create and interact with it.
Second, the project develops fine motor skills. Cutting, folding, gluing, and assembling small pieces require concentration and coordination.
Third, it encourages creativity and independent thinking. Students must decide how to represent information using physical objects.
The project also improves memory. Visual and tactile experiences can help students connect concepts with specific shapes, colors, and structures.
Developing Problem-Solving Skills
Creating a 3D textbook involves challenges. A pop-up may not stand correctly, a page may become too heavy, or a piece may not fit where planned.
Students must identify the problem and find a solution. They may need to change the size of an object, strengthen a page, or redesign a mechanism.
This process teaches persistence. Students learn that a first attempt does not always produce the final result.
Working as a Team
A 3D textbook can be created by a group of students. Each student can be responsible for one section.
One student might create the cover, another can design a science page, and another can create interactive activities.
The group can then assemble all the pages into one complete textbook.
Teamwork helps students learn how to communicate, share materials, divide responsibilities, and respect different ideas.
Making the Project Eco-Friendly
Recycled materials can be used throughout the project. Old cardboard boxes can become textbook pages. Packaging paper can become backgrounds. Newspaper can be used for decorations.
Students can also reuse old school papers that are blank on one side.
This teaches an important environmental lesson: creative projects can be made without producing unnecessary waste.
Presenting the 3D Textbook
Once the textbook is finished, students can present it to their classmates. They can explain the subject, describe the different pages, and demonstrate the interactive elements.
A presentation could begin with an explanation of why the student chose the topic. The student can then open the textbook and explain each page.
This improves speaking and presentation skills while allowing other students to learn from the project.
Using the Textbook in the Classroom
A completed 3D textbook can become a useful classroom resource. It can be displayed on a shelf or used during a lesson.
For example, a plant-themed textbook could be used when studying biology. Students could open the pages and identify different parts of a plant.
A mathematics textbook could be used to review geometric shapes.
In this way, the craft remains useful even after the project has been graded.
Conclusion
A 3D school textbook is a creative and educational project that transforms traditional learning materials into an interactive three-dimensional experience. Using cardboard, paper, glue, recycled materials, and simple craft techniques, students can create pages containing pop-up objects, raised pictures, miniature scenes, labels, flaps, wheels, and other interactive features.
The project can be adapted to almost any subject. Science, geography, mathematics, history, language, and environmental studies can all benefit from three-dimensional representations.
More importantly, creating a 3D textbook develops valuable skills. Students practice planning, measuring, cutting, folding, designing, problem-solving, teamwork, and communication. They also learn that education can be creative and hands-on.
A 3D school textbook does not need to be expensive or complicated. Even a small handmade book can provide an engaging learning experience when students use their imagination. By combining information with physical models and interactive elements, this project turns an ordinary school assignment into a memorable educational adventure.
