

A giant cardboard pencil is a creative, inexpensive, and educational craft project that can transform ordinary cardboard into a large and colorful school-themed decoration. Pencils are among the most familiar objects in a classroom, and making an oversized version allows students to explore art, recycling, design, measurement, and construction. A giant cardboard pencil can be displayed on a classroom door, placed on a school wall, used as a decoration for a learning corner, or included in a larger miniature classroom project.
The project is suitable for children, teachers, parents, and anyone who enjoys creative school crafts. It can be made with recycled cardboard boxes, paper, glue, scissors, paint, and markers. Although the final pencil may be much larger than a real pencil, its basic parts remain recognizable: the pointed tip, wooden body, colored section, and eraser. The activity demonstrates how simple geometric shapes can be combined to create a familiar object on a much larger scale.
The Idea of a Giant Cardboard Pencil
A giant cardboard pencil is essentially an enlarged model of an ordinary writing pencil. Its purpose can be decorative, educational, or both.
For a classroom decoration, the pencil can be placed beside a welcome message such as “Welcome to Our Classroom” or “Let’s Learn and Create.” For a school project, students can explain how they transformed recycled cardboard into a large object.
The pencil can also become part of a larger display. Several giant pencils in different colors can create a colorful classroom border. Each pencil could contain a student’s name, a positive word, or a short learning goal.
The project encourages students to look at familiar objects differently. A small pencil may seem ordinary, but enlarging it turns it into an interesting design challenge.
Materials Needed
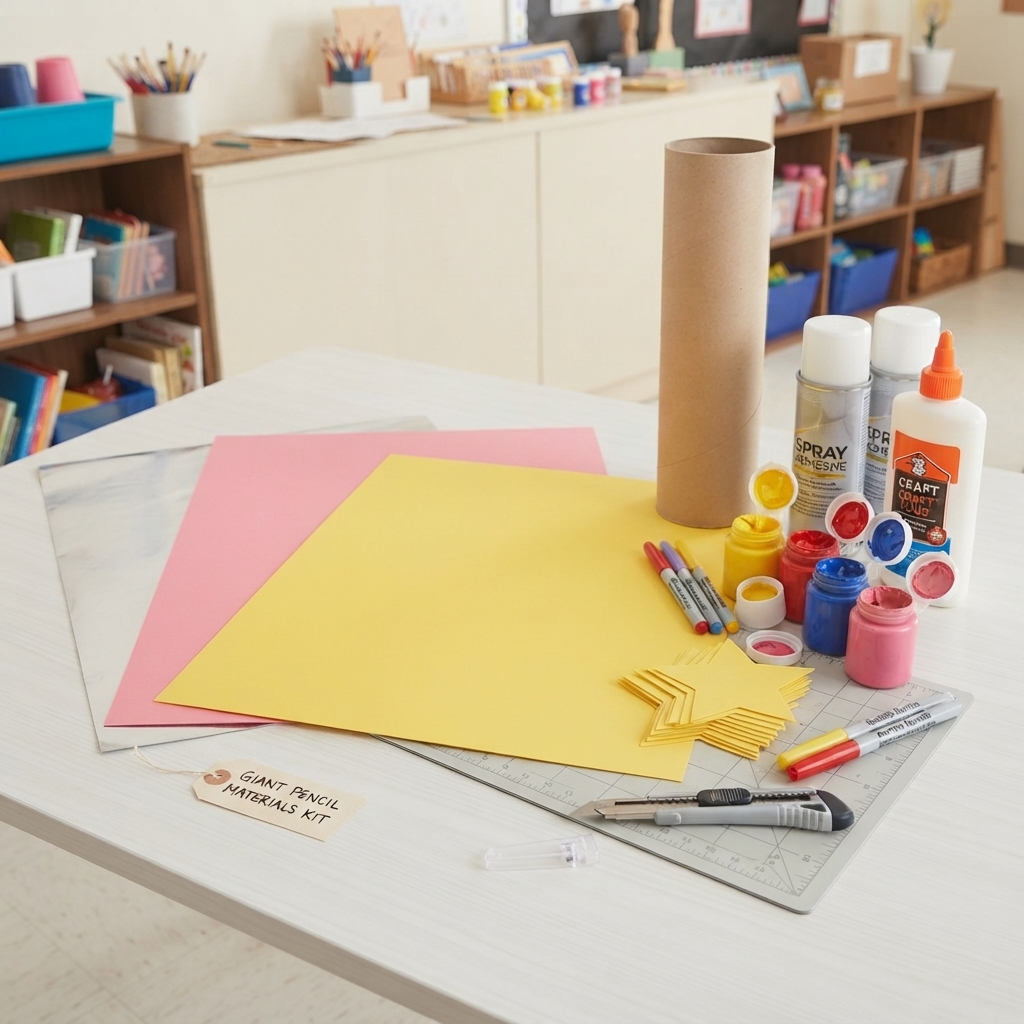
The materials for a giant cardboard pencil are simple. A large piece of clean cardboard or an empty cardboard box can provide the main structure.
Other useful materials include colored paper, newspaper, glue, masking tape, scissors, a ruler, a pencil, a compass or round object for drawing circles, and markers.
Paint can be used instead of colored paper. Gray or silver paper can represent the metal part of the pencil, while pink paper can represent the eraser.
Additional cardboard can be used to reinforce the structure.
When children are working with scissors, glue, or thick cardboard, adults should provide suitable supervision and assistance when necessary.
Planning the Shape
Before construction begins, students should draw a simple plan. A giant pencil is usually long and narrow, so the design should maintain these proportions.
The main body can be made as a long rectangular shape. One end can have a triangular point, while the other end can include a short metal section and an eraser.
Students can decide how large the pencil should be based on where it will be displayed. A small classroom wall may require a pencil that is one meter long, while a large school hallway could accommodate a much larger design.
Planning the dimensions before cutting helps reduce wasted cardboard.
Creating the Pencil Body
The body of the pencil can be made from a long rectangle of cardboard. If a single piece is not large enough, several pieces can be joined with tape.
The cardboard should be kept flat and strong. Additional strips can be attached to the back to reinforce the structure.
Students can choose the classic yellow color of a traditional pencil or create their own colorful design.
If colored paper is being used, it can be glued carefully over the cardboard. Paint can also be applied directly to the cardboard.
Making the Point
The pointed end is one of the most important features of the pencil. It can be created from a triangular piece of cardboard.
The triangle should be attached to one end of the rectangular body. The transition between the body and the point should be neat.
A smaller dark triangle can be added at the very end to represent the graphite.
Students can use black, dark gray, or another suitable color for the graphite section.
This part of the project introduces students to geometric shapes. They can identify the rectangle of the pencil body and the triangle of the pencil point.
Creating the Wooden Section
Real pencils have a wooden area around the graphite point. This can be represented with beige, light brown, or tan paper.
The wooden section can be placed between the colored pencil body and the graphite tip.
Students can draw a few thin lines on the wooden section to make it look more realistic. These lines can imitate the grain of wood.
Although this detail is simple, it helps viewers immediately recognize the object as a pencil.
Making the Metal Ferrule
At the opposite end of the pencil is the metal ferrule, which connects the pencil body to the eraser. On a giant cardboard pencil, this section can be represented by gray or silver paper.
A rectangular piece of cardboard can be covered with silver paper and attached to the end of the pencil.
Students can draw horizontal lines across it to imitate the ridges often found on real pencil ferrules.
If metallic paint is available, it can also be used to create a shiny effect.
Adding the Eraser
The eraser can be made from pink paper or painted cardboard. It should be attached to the end of the metal section.
A rounded shape can make the eraser look more realistic. Students can create the rounded edge by cutting the cardboard carefully or layering pieces of paper.
A large pink eraser makes the giant pencil especially colorful and recognizable.
Decorating the Pencil
Once the basic structure is complete, students can decorate it. A giant cardboard pencil does not have to look exactly like a traditional pencil.
Students can add stripes, stars, flowers, dots, letters, numbers, or geometric patterns.
They can also write educational messages along the body. For example, the pencil could say “Read,” “Create,” “Explore,” “Imagine,” or “Learn.”
Another idea is to write students’ names along the pencil. Each student could decorate one section.
Using the Pencil as a Classroom Display
A giant cardboard pencil can become an attractive classroom decoration. It can be placed above a reading corner, next to a classroom board, or beside a door.
A large pencil can also be used as a border for a bulletin board.
For example, several pencils can be arranged around a display titled “Our Learning Journey.” Each pencil can contain a different subject such as Mathematics, Science, Reading, Art, and History.
This makes the decoration both colorful and meaningful.
A Giant Pencil Classroom Door
The pencil can also be used to decorate a classroom door. A long pencil can be placed vertically on one side of the door, while a welcome message appears in the center.
Students can create small paper pencils with their names and attach them around the main decoration.
A message such as “Sharpen Your Mind!” can add a playful educational touch.
This type of decoration can make the classroom entrance more welcoming and encourage students to feel excited about learning.
Educational Benefits
Creating a giant cardboard pencil provides several educational benefits.
First, it develops creativity. Students have to imagine how an ordinary pencil can be represented at a much larger scale.
Second, it develops fine motor skills. Cutting, folding, drawing, and gluing require coordination and careful hand movements.
Third, it introduces mathematics. Students can measure the length and width of the cardboard and calculate proportions.
The project also encourages problem-solving. Students may discover that their cardboard is too weak or that a particular piece does not fit. They must find solutions.
Learning About Shapes
The giant pencil provides an excellent opportunity to teach geometry.
The body can be represented by a rectangle. The point can be represented by a triangle. The eraser may be a rectangle with a curved edge, while the ferrule can also be rectangular.
Students can identify these shapes and discuss their properties.
They can also learn about symmetry. A well-designed pencil should have approximately equal sides around its central axis.
This makes the craft a practical mathematics activity.
Learning About Measurement
Measurement is another important part of the project. Students can measure the length of the cardboard before cutting.
They can compare the size of the giant pencil with a real pencil and calculate how many times larger the model is.
For example, if a real pencil is approximately 18 centimeters long and the model is 180 centimeters long, the model is about ten times longer.
This gives students a simple introduction to scale and proportional reasoning.
Recycling Cardboard
Using cardboard makes the project environmentally friendly. Instead of throwing away clean packaging boxes, students can reuse them for the craft.
Recycling demonstrates that everyday waste can become a valuable creative material.
Teachers can use the project to discuss reducing waste, reusing materials, and recycling.
The activity also shows that a successful school craft does not need expensive supplies.
Working Together
A giant pencil can be large enough to require teamwork. Students can work in groups, with each person responsible for a different part.
One student can measure and cut the body, another can create the point, another can prepare the eraser, and others can decorate the surface.
Working together teaches communication and cooperation.
Students also learn to share materials and combine their ideas into one finished project.
Making Different Colored Pencils
A classroom can create an entire collection of giant cardboard pencils. Each pencil can have a different color.
For example, one could be red, another blue, another green, and another purple.
Each color could represent a different subject or classroom group.
The pencils can be arranged on a wall to create a bright educational display.
Creating a Giant Pencil Holder
Another creative idea is to turn the cardboard pencil concept into a large pencil holder. Instead of making only a flat decoration, students can construct a three-dimensional pencil-shaped container.
A cardboard tube or recycled box can form the body. The container can hold lightweight classroom decorations or paper materials.
This version is more challenging because it requires a stable three-dimensional structure, but it provides an excellent opportunity to explore construction.
Adding Student Messages
The giant pencil can become an interactive classroom display. Students can write short messages, goals, or positive words on small paper cards.
These cards can be attached to the pencil.
For example, students might write “I will read more,” “I will help my classmates,” or “I will try my best.”
The pencil then becomes a symbol of learning and personal growth.
Tips for a Successful Project
Careful planning is the key to creating a successful giant cardboard pencil. Students should measure twice before cutting.
The cardboard should be strong enough to support the finished decoration. If it bends, additional strips can be attached to the back.
Glue should be used carefully, and pieces should be allowed to dry before the next stage.
The finished pencil should also be displayed safely. If it is placed on a wall or door, it should be attached securely and should not block handles, windows, signs, or emergency equipment.
Conclusion
A giant cardboard pencil is a simple but imaginative school craft project that combines art, mathematics, recycling, and creativity. With cardboard, paper, glue, scissors, and a few decorative materials, students can transform an ordinary piece of packaging into an oversized symbol of education.
The project teaches students about geometric shapes, measurement, proportion, construction, and design. It also develops fine motor skills, creativity, teamwork, patience, and problem-solving abilities.
The finished pencil can serve many purposes. It can decorate a classroom door, brighten a school hallway, frame a bulletin board, become part of a miniature classroom, or display student names and learning goals.
Most importantly, the giant cardboard pencil reminds students that learning can be creative. A familiar school object becomes a large artistic project through imagination and careful work. By reusing cardboard and involving students in every stage of the process, teachers can create an activity that is inexpensive, educational, environmentally responsible, and enjoyable. A simple cardboard pencil can therefore become much more than a decoration—it can become a colorful symbol of curiosity, creativity, and the joy of learning.
