

Creating a small student from a toilet paper roll is a simple, creative, and educational craft project for children. With a recycled cardboard tube, colored paper, glue, scissors, markers, and a little imagination, an ordinary household object can be transformed into a charming miniature school student. This craft is especially suitable for classroom activities, school projects, storytelling exercises, and miniature school displays.
The project is valuable because it combines creativity with recycling. Children learn that materials that might normally be thrown away can be reused to create something new. At the same time, they practice cutting, folding, drawing, measuring, and assembling different pieces. The finished paper-roll student can become part of a larger classroom scene containing desks, chairs, books, backpacks, pencils, and other school objects.
The Idea Behind the Craft
The basic idea is to use an empty toilet paper roll as the body of a miniature student. The cardboard tube already has a convenient cylindrical shape, so it provides a strong foundation for the character.
Colored paper can be wrapped around the tube to create clothing. A round piece of paper can become the head, while small paper strips can represent arms and legs. Hair, eyes, shoes, and school accessories can then be added.
There are many ways to design the character. The student can wear a school uniform, casual clothing, a backpack, glasses, a hat, or a colorful sweater. Each child can create a unique character according to their imagination.
Materials Needed
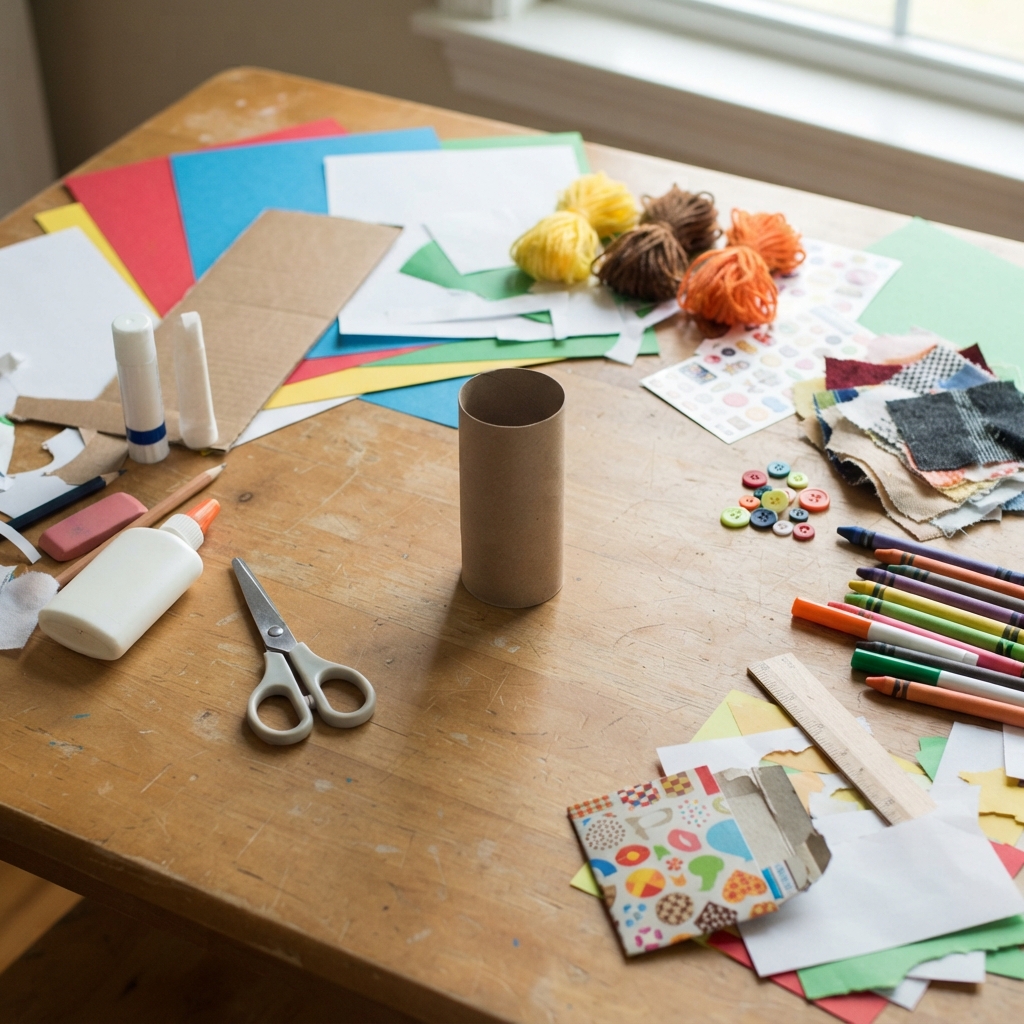
The project requires only a few basic materials. The most important material is a clean and empty toilet paper roll.
Other materials may include colored paper, white paper, cardboard, glue, scissors, pencils, crayons, colored markers, and a ruler. Small pieces of yarn can be used for hair, while fabric scraps can become clothing.
Buttons, stickers, paper scraps, and recycled packaging can also be useful for decoration.
For younger children, adults should provide appropriate supervision when scissors or other crafting materials are being used.
Preparing the Toilet Paper Roll
Before construction begins, the toilet paper roll should be clean, dry, and free from remaining paper.
The cardboard tube becomes the body of the student. Because it already stands upright, it can easily represent a person.
Students can measure the height and circumference of the roll. This introduces a simple mathematics component to the craft.
If the tube is too tall for the desired design, an adult can help adjust it. However, most standard toilet paper rolls are suitable for a miniature student.
Creating the Clothing
Colored paper can be wrapped around the cardboard tube to create the student’s clothes.
For example, blue paper can represent trousers or a school uniform, while a white rectangle can become a shirt. A small red or yellow strip can represent a tie.
The paper should fit around the tube without being too loose. Glue can be applied carefully to the edge to hold the paper in place.
Students can draw buttons, pockets, patterns, or school symbols on the clothing.
This is one of the most creative parts of the activity because every student character can have a different style.
Making the Head
The head can be made from a circle of cardboard or thick paper. Students can draw a face on the circle before attaching it to the top of the toilet paper roll.
Simple eyes, a nose, a mouth, and ears can be drawn with markers.
For a three-dimensional effect, the head can be made from a small paper ball or another lightweight recycled material.
The head should be attached securely to the top of the cardboard body.
Creating Hair
Hair can be created in several ways. Colored paper can be cut into strips and attached around the top of the head.
Yarn is another useful material. Small pieces of yarn can be glued around the head to create curly, straight, short, or long hair.
Students can choose any color that suits their character.
The hair does not have to look realistic. The purpose is to give the miniature student personality and character.
Making the Arms
The arms can be made from narrow strips of colored paper. Two strips can be cut to approximately the same length.
The strips can be folded slightly to give them shape. They can then be glued to the sides of the cardboard body.
Small circles of paper can represent hands.
The position of the arms can also tell a story. One arm might be raised as if the student is answering a question, while another might be holding a book.
Creating the Legs
The legs can be made from two narrow pieces of cardboard or folded paper.
They can be attached to the bottom of the toilet paper roll. Students should make the legs approximately equal in length so that the character can stand properly.
Small black, brown, or colorful pieces of paper can represent shoes.
If the student is wearing a school uniform, the legs can be made from matching paper.
Adding a Backpack
A school student would not be complete without a backpack. A miniature backpack can be made from a small piece of colored paper or cardboard.
The backpack can be cut into a simple rectangular or rounded shape and attached to the back of the character.
Two narrow strips can represent shoulder straps.
Students can decorate the backpack with stars, hearts, initials, numbers, or other symbols.
The backpack can also be made as a separate accessory that can be removed from the student.
Adding School Supplies
Small school supplies can make the character more realistic. Students can create tiny books, notebooks, pencils, and rulers from paper.
A miniature book can be made by folding a small rectangle of paper in half. A tiny pencil can be represented by a narrow strip of yellow paper.
A small ruler can be made from a thin piece of cardboard with short lines drawn across it.
These accessories can be placed in the student’s hands or attached to the backpack.
Creating Different Student Characters
One of the most enjoyable possibilities is to create several students instead of just one.
Each character can have a different hairstyle, clothing style, backpack, facial expression, or school accessory.
For example, one student can be holding a book, another can hold a pencil, and another can carry a small science project.
This allows children to create an entire classroom from toilet paper rolls.
Building a Miniature Classroom
The paper-roll students can become part of a larger school craft project. A cardboard box or shoebox can be transformed into a miniature classroom.
Students can create small tables and chairs from wooden craft sticks or cardboard. A board can be placed on the wall, while tiny books and school supplies can be arranged on the desks.
The toilet-paper-roll students can then be placed inside the classroom.
This creates a complete three-dimensional school scene.
Creating a Teacher
The same technique can be used to create a miniature teacher.
A different color of paper can be used for the teacher’s clothing. The character can hold a small book, marker, or pointer.
The teacher can stand at the front of the classroom beside a miniature board.
This makes the scene more realistic and can be used for storytelling or classroom presentations.
Educational Benefits
Making a small student from a toilet paper roll provides many educational benefits.
First, it develops fine motor skills. Children practice cutting small shapes, folding paper, applying glue, and placing decorations.
Second, the activity encourages creativity. Students must decide how their character should look and what accessories it should have.
Third, it develops spatial awareness. Children learn how different flat materials can be combined around a three-dimensional object.
The project can also support language development because students can create a story about their miniature character.
Learning About Recycling
Recycling is an important part of this craft. Toilet paper rolls are often thrown away after use, but they can be transformed into useful art materials.
Teachers can use the project to explain the importance of reducing waste and reusing everyday objects.
Children can learn that recycling does not have to be complicated. Simple materials can become creative projects when people use imagination.
The activity can also encourage students to collect other clean cardboard materials for future crafts.
Developing Storytelling Skills
The miniature student can become a character in a story.
For example, students might imagine that their paper-roll student is starting school for the first time. The character could have a name, favorite subject, hobbies, friends, and a special backpack.
Children can write or tell a short story about the character.
This connects art with language learning. Students practice vocabulary, sentence construction, description, and imagination.
Using the Craft to Teach Emotions
Another interesting idea is to create students with different facial expressions.
One character might look happy, another surprised, another excited, and another thoughtful.
Teachers can use these characters to discuss emotions. Children can describe why a character might feel happy, nervous, proud, or curious.
This makes the craft useful for social and emotional learning.
Creating a School Display
A collection of paper-roll students can create an attractive classroom display.
Each child can make one character and add a small name card.
The students can be arranged around a miniature classroom, school bus, library, or playground.
A display title such as “Our Little School” or “Meet Our Mini Students” can be placed above the scene.
This type of display celebrates student creativity and creates a colorful learning environment.
Making the Project More Realistic
Small details can make the miniature student more interesting.
A tiny watch can be drawn on the wrist. A small badge can be attached to the clothing. A paper notebook can be placed in the hands.
Glasses can be created from thin paper strips. A small hat can be made from folded cardboard.
Students should not worry about making every detail perfect. The most important part is that the character reflects their imagination.
Working in Groups
This project can be completed individually or as a group.
In a classroom, each child can create one paper-roll student. The teacher can then help the class combine all the characters into one large school scene.
Some students can create furniture, while others make books, school bags, posters, or classroom decorations.
This encourages teamwork and gives every child an important role.
Problem-Solving During Construction
Craft projects do not always work perfectly on the first attempt. A head may fall off, an arm may be too long, or the character may not stand correctly.
These problems create opportunities for problem-solving.
Students can ask themselves what went wrong and how they can fix it. They might strengthen the base, change the size of a piece, or use additional cardboard.
This teaches persistence and shows children that mistakes are a natural part of creating something.
Tips for a Successful Project
A few simple tips can make the project easier.
Students should measure paper before cutting it around the toilet paper roll. They should also apply glue carefully because too much glue can make paper wrinkled.
Small pieces should be prepared before assembly so that the student is easier to construct.
It is also helpful to allow glue to dry between stages. Rushing the process can cause pieces to move or fall off.
Finally, students should be encouraged to experiment with different designs rather than trying to make every character identical.
Conclusion
A small student made from a toilet paper roll is a simple, affordable, and imaginative school craft that combines creativity, recycling, storytelling, and hands-on learning. An ordinary cardboard tube can become the body of a miniature student when combined with paper, glue, markers, and a little imagination.
The project teaches children valuable skills such as cutting, folding, measuring, designing, assembling, and problem-solving. It also introduces important ideas about recycling and responsible use of materials.
The finished character can stand alone as a small decoration or become part of a larger miniature classroom. Children can create desks, chairs, books, backpacks, teachers, school buses, and other objects to build an entire school environment.
Most importantly, the activity encourages children to see possibilities in ordinary objects. A toilet paper roll may seem like simple waste, but with creativity it can become a student with a face, clothes, school supplies, and a story. This makes the project an excellent example of how art and education can work together to create a fun, meaningful, and memorable learning experience.
