
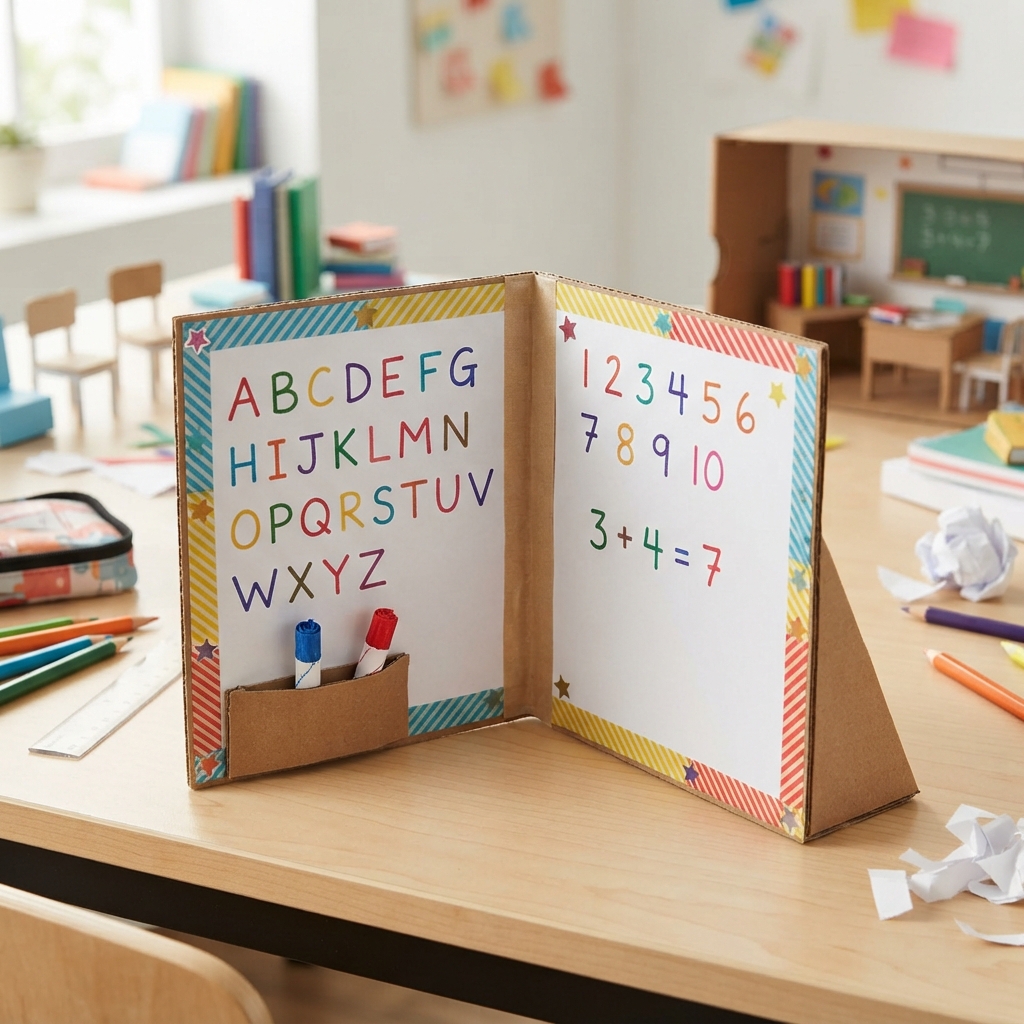
A small foldable whiteboard is a creative and practical educational project that can be made from simple materials such as cardboard, white paper, plastic sheets, or lightweight recycled boards. It is designed to look like a miniature classroom whiteboard that can be folded, carried, opened, and used for writing or drawing. This project is especially suitable for children, teachers, school craft activities, and miniature classroom models.
Unlike a traditional large classroom board, a small foldable whiteboard takes up very little space. Its folding design makes it easy to store and transport. It can be used as a decorative object, a learning tool, or part of a larger school-themed craft project. Children can personalize it with colorful borders, educational drawings, letters, numbers, and small classroom decorations.
Creating a small foldable whiteboard also provides an opportunity to learn about design, measurement, recycling, and organization. With careful planning and a few inexpensive materials, students can create an attractive miniature board that represents a real classroom tool.
The Idea of a Foldable Whiteboard
The main idea is to create a whiteboard with two or more panels connected by a flexible joint. When the panels are opened, they create a larger writing surface. When they are folded together, the board becomes compact and easy to store.
The project can be designed in several ways. A simple version can have two rectangular panels. A more advanced version can have three panels, creating a central board with two smaller side sections.
The board does not need to be large. A miniature version can be approximately the size of a notebook or smaller, depending on its purpose.
For a school craft project, the board can be placed inside a shoebox classroom alongside miniature desks, chairs, books, and paper students.
Materials Needed
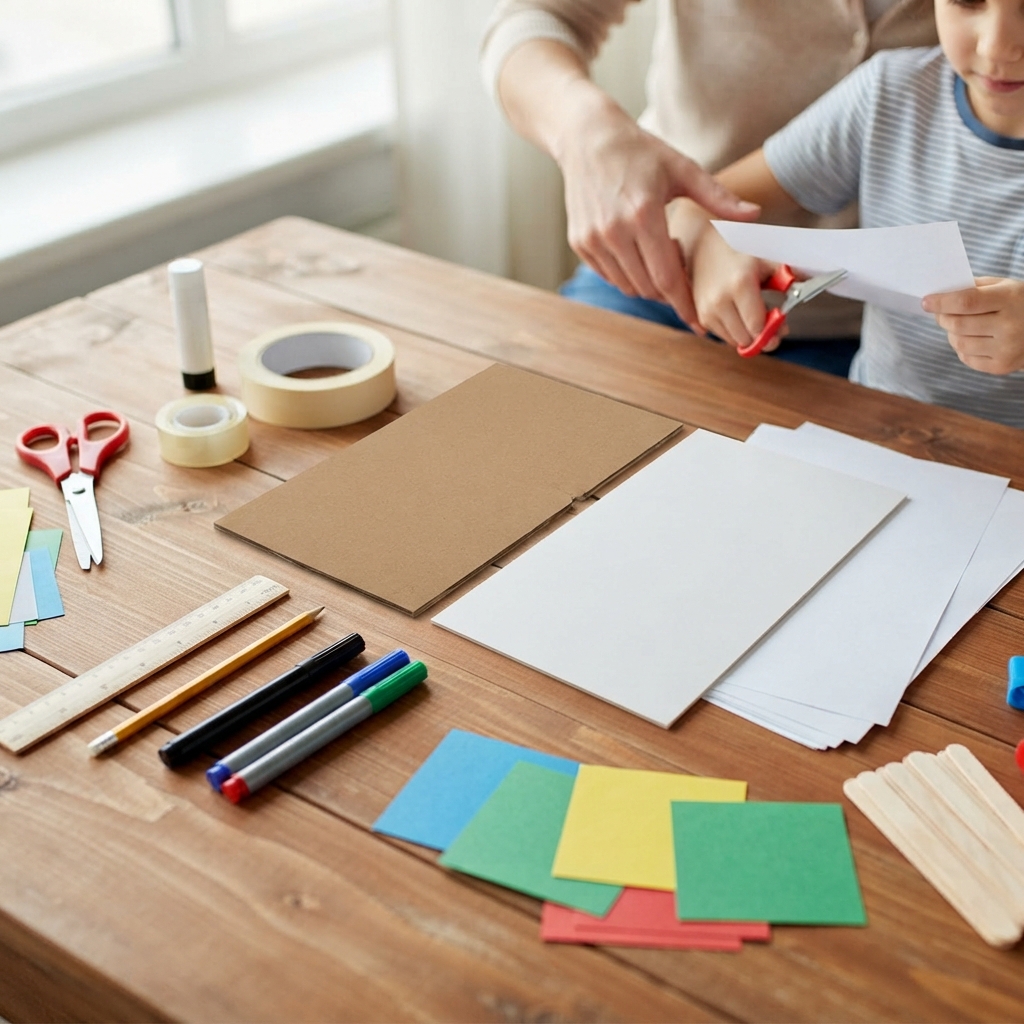
The materials for making a small foldable whiteboard are simple and inexpensive.
Useful materials include thick cardboard, white paper, scissors, glue, tape, a ruler, a pencil, and markers. A plastic sheet or smooth white card can also be used to create a stronger writing surface.
Colored paper can be used for the frame. Craft sticks can create decorative edges or supports.
For the folding mechanism, strong tape can act as a simple hinge. Two cardboard panels can be placed next to each other with a small gap between them, and tape can be attached along the back.
Children should use scissors carefully and receive adult help when necessary.
Planning the Design
Planning is an important part of the project. Before cutting the cardboard, students should decide how many panels the whiteboard will have.
A two-panel board is usually the easiest design for beginners. Each panel can be the same size.
Students should measure the cardboard using a ruler and mark straight lines with a pencil. Accurate measurements help the panels fit together properly.
The student can also decide whether the board will stand on a table, hang on a wall, or simply fold flat.
Creating the Cardboard Panels
The first construction step is cutting the cardboard into two equal rectangular panels.
The cardboard should be thick enough to remain firm but not so thick that it becomes difficult to fold or connect.
If recycled cardboard is being used, students can cover the surface with white paper.
The edges can be reinforced with tape to make the panels stronger.
For a cleaner appearance, the student can cover the entire front surface with smooth white paper.
Making the White Surface
The most important part of the project is the white writing area. A smooth white sheet can be glued to the front of each cardboard panel.
Students should carefully smooth the paper from the center outward to reduce wrinkles and air bubbles.
Another option is to use a smooth white plastic sheet that can be wiped clean. However, the material should be selected carefully to ensure that it is safe and suitable for the intended markers.
For a decorative classroom model, ordinary white paper may be sufficient.
Creating the Fold
The two panels need to be connected in a way that allows them to open and close.
A simple solution is to use strong tape as a hinge. The two cardboard panels are positioned next to each other, and a strip of tape is placed along the back.
The tape should be flexible enough to allow movement.
Students can test the fold by opening and closing the board slowly.
If the panels do not move smoothly, the hinge may need adjustment.
Adding a Decorative Frame
A colorful frame can make the small whiteboard more attractive.
Strips of colored paper can be attached around the edges. Blue, green, yellow, red, or any other color can be used.
The frame also helps cover the rough edges of the cardboard.
For a realistic classroom appearance, students can choose a simple gray, black, or wooden-style frame.
Small geometric decorations can be added to the corners.
Creating a Stand
A foldable whiteboard can be designed to stand on a desk or table. A simple cardboard support can be attached to the back.
The support can be folded into a triangular shape. This gives the board stability when it is open.
Another option is to create two small feet at the bottom.
Students should test the stand on a flat surface. If the board falls backward, the support may need to be made wider.
Adding a Marker Holder
A miniature whiteboard can include a tiny marker holder.
A small strip of cardboard can be folded into a pocket and attached to the bottom edge of the board.
The pocket can hold one or two small paper markers.
For a larger model, short pieces of drinking straw can be attached as marker holders.
This small feature makes the craft more realistic and teaches students how everyday objects can be represented using simple materials.
Making Miniature Markers
Tiny markers can be made from narrow strips of colored paper.
Students can roll or fold the strips into small cylinders. A darker piece at one end can represent the marker tip.
Different colors can be created to represent red, blue, green, black, and other markers.
These miniature markers can be placed in the holder or displayed beside the board.
Adding Educational Content
The whiteboard can contain educational information. Students can write letters, numbers, simple words, mathematical equations, or classroom rules.
For example, one panel could show the alphabet, while the other could contain numbers from one to ten.
A science-themed whiteboard might show the names of planets or parts of a plant.
This transforms the craft from a decoration into a learning resource.
Using the Board for Mathematics
A small foldable whiteboard is particularly useful for practicing mathematics.
Children can write addition, subtraction, multiplication, or division exercises.
A teacher could use a miniature version to demonstrate how problems are solved step by step.
Students can also draw geometric shapes such as circles, squares, triangles, and rectangles.
Because the board can be wiped clean when a suitable reusable surface is used, the same activity can be repeated many times.
Using the Board for Language Learning
The board can also support language activities.
Students can write new vocabulary words, short sentences, spelling exercises, or simple questions and answers.
For younger learners, teachers can write individual letters and ask children to form words.
A small board can therefore become a useful tool for practicing reading and writing.
Creating a Miniature Classroom
The foldable whiteboard can become part of a larger classroom craft project.
A shoebox or cardboard box can be transformed into a miniature classroom. Small tables and chairs can be made from wooden sticks, while students can be created from paper or toilet paper rolls.
The foldable whiteboard can be placed at the front of the classroom.
Other details can include a clock, bookshelf, school bags, books, posters, and a teacher’s desk.
Together, these objects create a complete three-dimensional learning environment.
Educational Benefits
Making a small foldable whiteboard provides many educational benefits.
First, it develops fine motor skills. Children must measure, cut, fold, glue, and decorate the materials.
Second, it encourages spatial thinking. Students must understand how two-dimensional cardboard panels can become a movable three-dimensional object.
Third, the project develops problem-solving skills. Children must figure out how to create a working hinge and stable support.
The activity also encourages creativity because students can decide how their board looks and what educational content it displays.
Learning About Hinges
The folding mechanism provides a simple introduction to engineering.
A hinge is a connection that allows one part to move relative to another. In the miniature whiteboard, the tape acts as a flexible hinge between the two panels.
Students can experiment with opening the board at different angles.
They can observe how the position of the panels affects stability.
This simple activity introduces concepts related to movement, structure, and mechanical design.
Using Recycled Materials
Recycling is another important aspect of the project.
Old cardboard boxes can become the board panels. Paper scraps can be used for decoration. Clean packaging materials can provide additional structural pieces.
Reusing materials teaches students that useful objects can be created from things that might otherwise become waste.
The project can therefore be included in an environmental education lesson.
Decorating the Whiteboard
Students can personalize their boards with colorful decorations.
Small stars, flowers, numbers, letters, animals, or school symbols can be placed around the frame.
The corners can contain small paper decorations.
Students can also write a classroom message such as “Learn Every Day,” “Welcome to Our Class,” or “Let’s Explore.”
The decoration should remain simple enough that the board still looks like a functional educational object.
Working as a Group
The activity can be completed individually or as a group.
In a classroom, one group can build the whiteboard while another group creates tables and chairs.
Other students can create books, backpacks, posters, and miniature students.
At the end, all the pieces can be combined into one large school scene.
This approach encourages cooperation and allows students to contribute different skills.
Testing and Improving the Design
Testing is an important stage of construction.
Students should open and close the board several times to check whether the hinge works properly.
They should also test whether the board can stand without falling.
If the cardboard bends, additional support can be added. If the hinge is too stiff, the tape can be adjusted.
These improvements teach children that designing and building often require several attempts.
A Portable Learning Tool
One of the main advantages of a foldable whiteboard is portability.
When folded, it takes up less space than when it is open. This makes it easy to carry between activities or store in a classroom box.
A miniature version can be taken home by students as part of a school project.
It can also be used during presentations. A student can open the board and use it to demonstrate an idea.
Creative Variations
There are many ways to modify the basic design.
A three-panel board can provide a larger writing area. A board with colorful side panels can create a playful classroom style.
Students can also add a small clock, calendar, vocabulary cards, or magnetic-style paper pieces.
Another idea is to create a science board with removable pictures of planets, animals, or plants.
These variations allow students to adapt the project to different subjects.
Tips for a Successful Project
Careful measurement is one of the most important tips. The panels should be similar in size so that the board folds properly.
The cardboard should be strong enough to support the decorations.
Glue should be used sparingly, and students should allow each section to dry before moving on.
The folding mechanism should be tested before adding heavy decorations.
Finally, students should keep the design simple and organized. A clean white writing surface makes the board look more realistic.
Conclusion
A small foldable whiteboard is an excellent educational craft project that combines creativity, practical design, recycling, and learning. With cardboard, paper, glue, tape, and simple decorations, students can create a miniature board that opens and closes like a real classroom whiteboard.
The project teaches valuable skills such as measuring, cutting, folding, assembling, testing, and problem-solving. It also introduces basic engineering concepts through the use of hinges and supports.
The finished whiteboard can be used as a decoration, a learning tool, or an important part of a miniature classroom. It can display letters, numbers, vocabulary, mathematics exercises, science facts, or classroom messages.
Most importantly, this project demonstrates that educational materials can be created with simple and recycled resources. A few pieces of cardboard can become a useful and attractive learning object when combined with imagination and careful work.
Whether it is displayed on a miniature classroom wall, used in a school exhibition, or included in a larger craft project, the small foldable whiteboard provides children with an enjoyable way to learn through making. It is a practical example of how creativity, education, and hands-on construction can come together in one simple project.
