
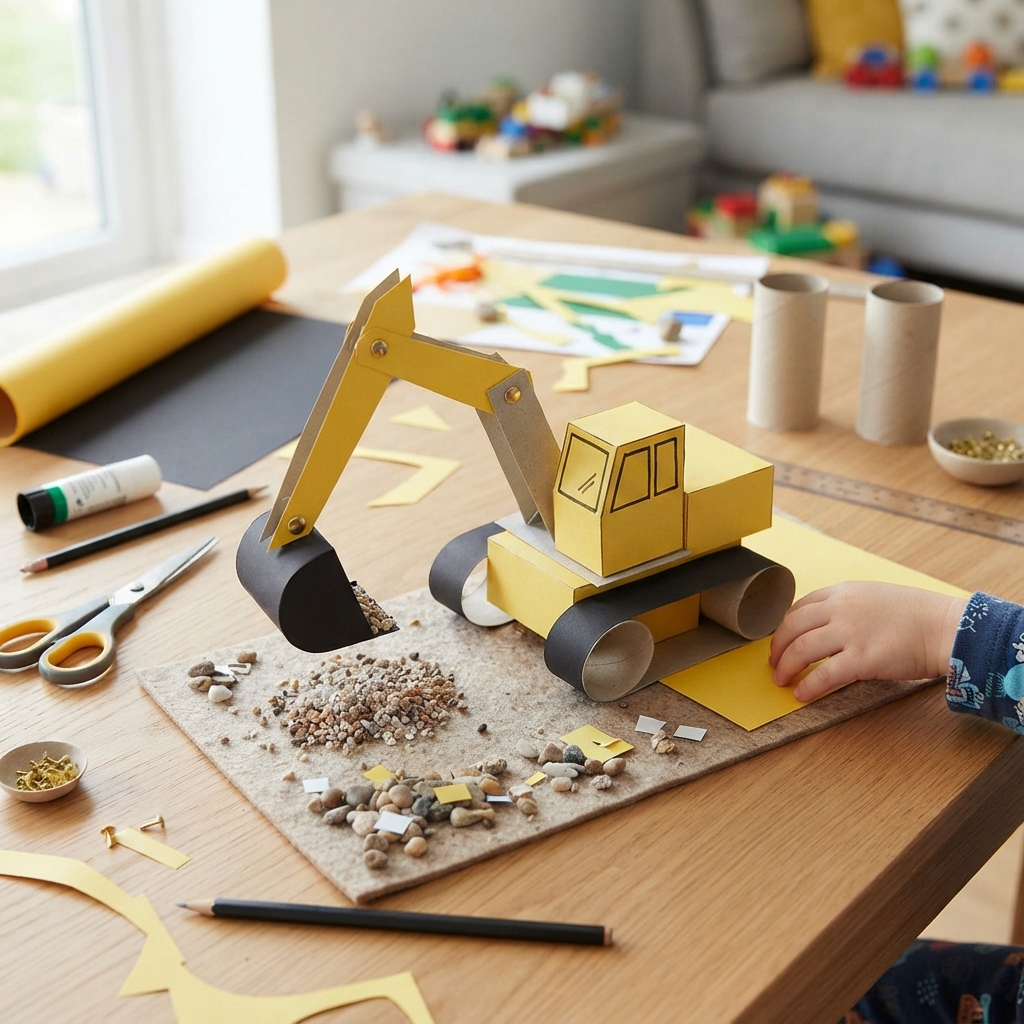
A paper excavator is an exciting craft project that lets children explore the fascinating world of construction through creativity and hands-on learning. Using paper, recycled cardboard, and a few simple craft supplies, kids can build their own miniature excavator and enjoy hours of imaginative play.
This project is perfect for home, school, libraries, or community craft workshops. It encourages recycling, develops fine motor skills, and introduces children to basic engineering and construction concepts. The finished excavator is designed for pretend play only and is not intended to dig real soil or lift heavy objects.
Why Make a Paper Excavator?
Excavators are among the most recognizable construction vehicles. Their movable arm and bucket make them exciting machines for children to watch and learn about. Building a paper version allows kids to understand the basic parts of an excavator while expressing their creativity.
This activity helps children:
- Develop creativity and imagination.
- Improve hand-eye coordination.
- Practice cutting, folding, and gluing.
- Learn simple engineering concepts.
- Build patience and concentration.
- Discover the importance of recycling.
Materials You’ll Need
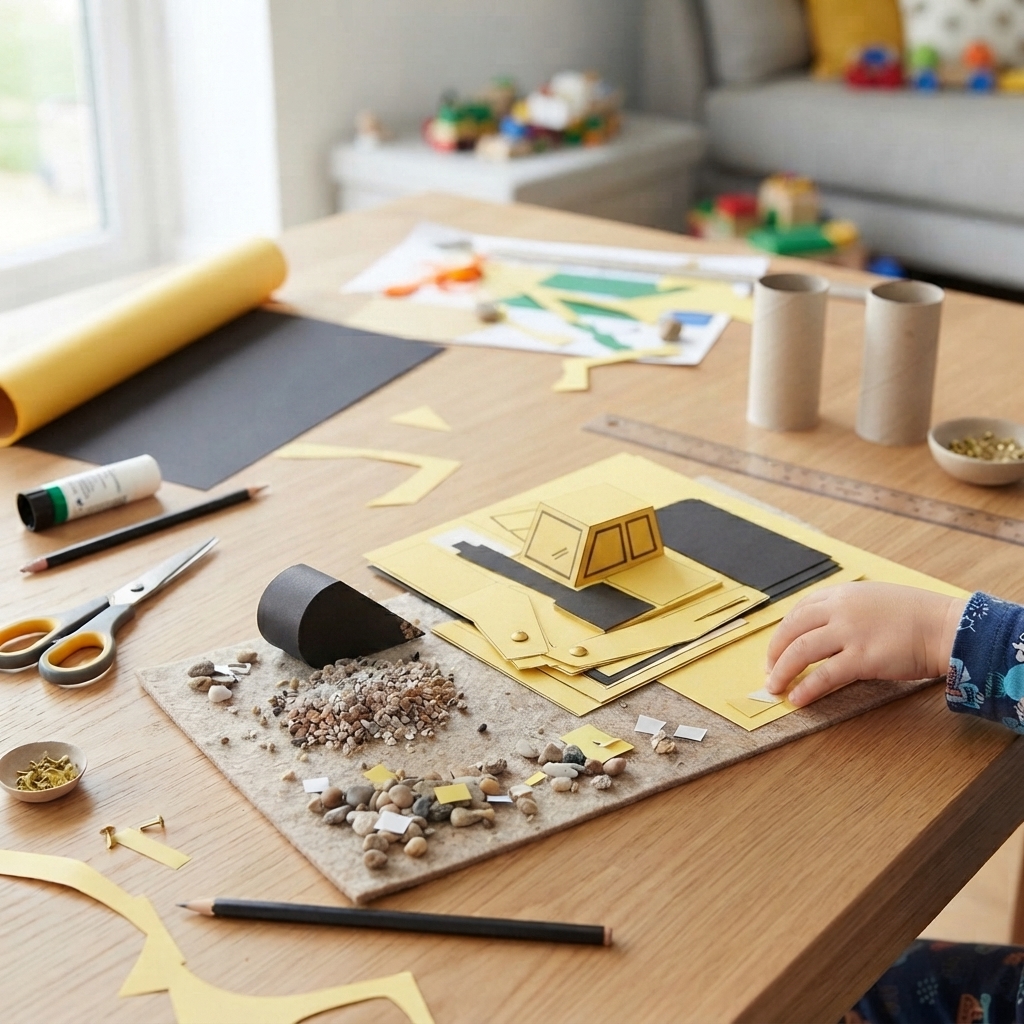
Gather these supplies before you begin:
- Recycled cardboard
- White paper
- Colored construction paper
- Pencil
- Ruler
- Child-safe scissors
- Craft glue
- Tape
- Cardboard tubes or rolled paper tubes (optional)
- Bottle caps or cardboard circles for wheels or tracks
- Markers or crayons
- Paint (optional)
- Paintbrushes
- Stickers and decorative items
Most of these materials are inexpensive and easy to find.
Prepare Your Workspace
Before starting:
- Cover your table with newspaper or a craft mat.
- Organize all your supplies.
- Leave enough space for assembling the excavator.
- Ask an adult for help when cutting thick cardboard.
A clean workspace makes crafting easier and more enjoyable.
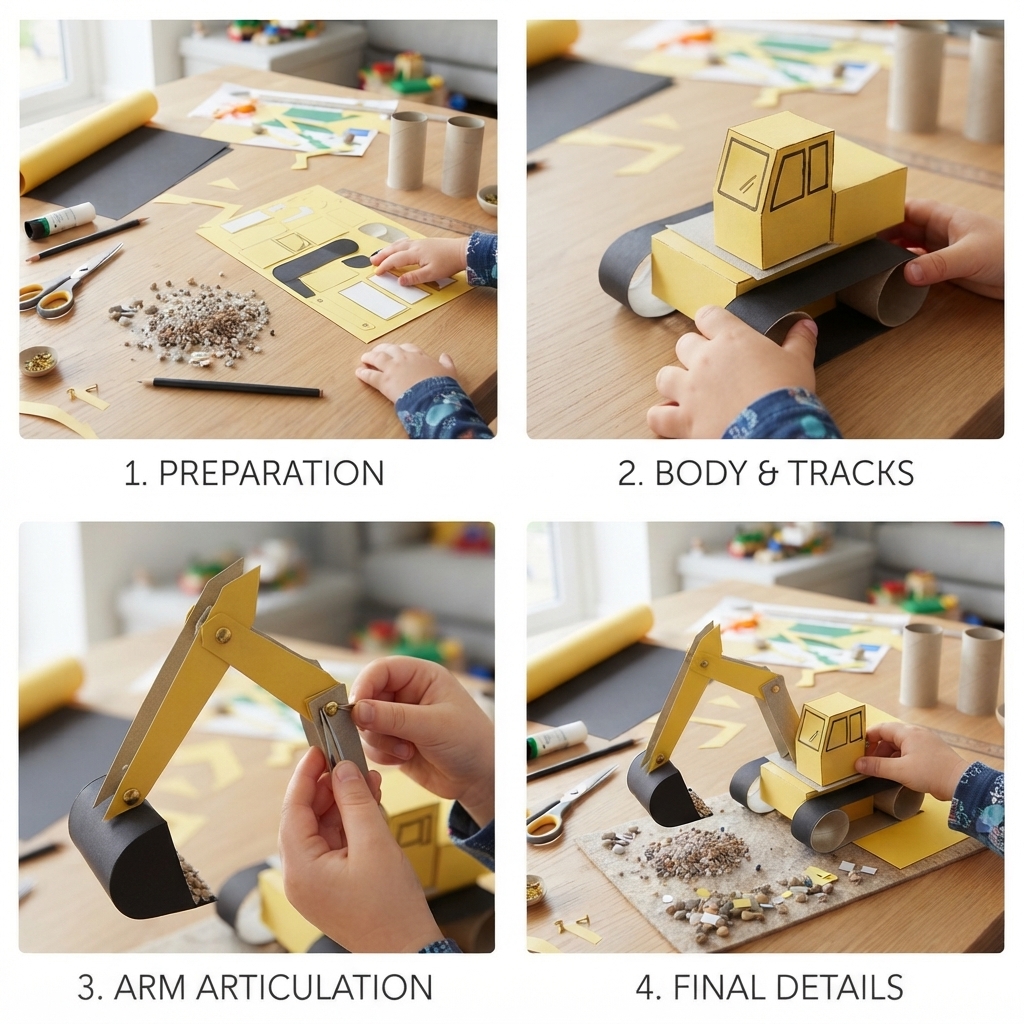
Step 1: Build the Excavator Body
Draw a rectangle on cardboard to create the main body.
Cut out the shape and fold the sides to form a sturdy base.
Glue the pieces together and allow them to dry.
Step 2: Make the Cab
Cut small cardboard pieces to build the driver’s cab.
Glue the walls and roof together.
Draw windows, headlights, and doors using markers or crayons.
Step 3: Create the Excavator Arm
Cut two long cardboard strips.
Glue them together to make a strong arm.
Attach the arm to the front of the excavator.
For extra fun, you can connect the sections with paper fasteners so the arm can move during play.
Step 4: Make the Bucket
Cut a small curved piece of cardboard.
Fold it gently into a scoop shape.
Glue it securely to the end of the excavator arm.
The bucket is designed to scoop only lightweight paper items during pretend play.
Step 5: Add Wheels or Tracks
Cut four cardboard circles for wheels or create long paper tracks using strips of cardboard.
Glue them onto the sides of the excavator.
Decorate them with simple patterns to resemble real construction vehicles.
Step 6: Decorate Your Excavator
Now it’s time to add color!
Children can decorate their excavator with:
- Yellow construction colors
- Black safety stripes
- Stars
- Lightning bolts
- Rainbow patterns
- Animal stickers
- Smiling faces
- Their names
Every excavator becomes a unique creation.
Creative Decoration Ideas
Classic Construction Excavator
Use yellow, gray, and black for a realistic look.
Rainbow Excavator
Decorate every part with bright rainbow colors.
Nature Explorer Excavator
Add trees, flowers, butterflies, and birds.
Space Excavator
Draw planets, rockets, stars, and astronauts.
Super Builder Excavator
Decorate with superhero symbols and bold colors.
Friendly Cartoon Excavator
Give the excavator large eyes and a cheerful smile.
Skills Children Learn
While building this project, children develop:
- Fine motor skills
- Hand-eye coordination
- Creativity
- Problem-solving
- Measuring skills
- Planning
- Cutting and gluing techniques
- Patience
- Recycling awareness
These skills encourage confidence and creative thinking.
Learning About Excavators
Parents and teachers can explain that real excavators are used to:
- Dig foundations.
- Move soil and sand.
- Build roads.
- Prepare construction sites.
- Help with landscaping.
- Remove rubble during building projects.
Children learn that each construction vehicle has a special job.
Pretend Play Ideas
After completing the excavator, children can:
- Scoop crumpled paper balls.
- Build a pretend construction site.
- Create roads using cardboard.
- Move toy building materials.
- Build a miniature town.
- Invent exciting construction adventures.
Role-playing helps children develop communication, cooperation, and storytelling skills.
Build a Complete Construction Collection
The paper excavator works perfectly with other construction-themed crafts, including:
- A paper hammer
- A paper screwdriver
- A cardboard wrench
- A cardboard drill
- A safe paper saw
- A paper measuring tape
- A cardboard construction helmet
- A paper toolbox
- A cardboard construction shovel
- A small paper handcart
- Cardboard building blocks
- A paper cement mixer
- A paper construction crane
Together, these crafts create a complete pretend construction site filled with endless opportunities for imaginative play.
Perfect for School Projects
Teachers can use this activity during:
- Art lessons
- STEM projects
- Recycling activities
- Engineering challenges
- Transportation lessons
- Construction-themed classroom units
Students can also work together to build an entire paper construction site.
Safety Tips
To keep the project safe:
- Always use child-safe scissors.
- Ask an adult to cut thick cardboard.
- Keep all edges smooth and rounded.
- Use the bucket only with lightweight paper or craft materials.
- Handle the finished model carefully during play.
These simple safety rules help everyone enjoy the project.
Tips for Success
For the best results:
- Use sturdy recycled cardboard.
- Reinforce the excavator arm with extra layers.
- Let the glue dry completely.
- Encourage children to invent their own decorations.
- Celebrate creativity instead of perfection.
Every handmade excavator reflects a child’s imagination and creative ideas.
Conclusion
Making a paper excavator is a fun, affordable, and educational craft project that introduces children to the exciting world of construction and engineering. With simple recycled materials, kids can build a colorful excavator while developing fine motor skills, creativity, and problem-solving abilities.
Whether at home, in the classroom, or during a community craft event, this project transforms ordinary paper and cardboard into an exciting construction vehicle. Combined with handmade tools, building blocks, a crane, a cement mixer, and other construction-themed crafts, the paper excavator becomes part of a complete pretend building site where children can learn, create, and enjoy endless adventures.
