
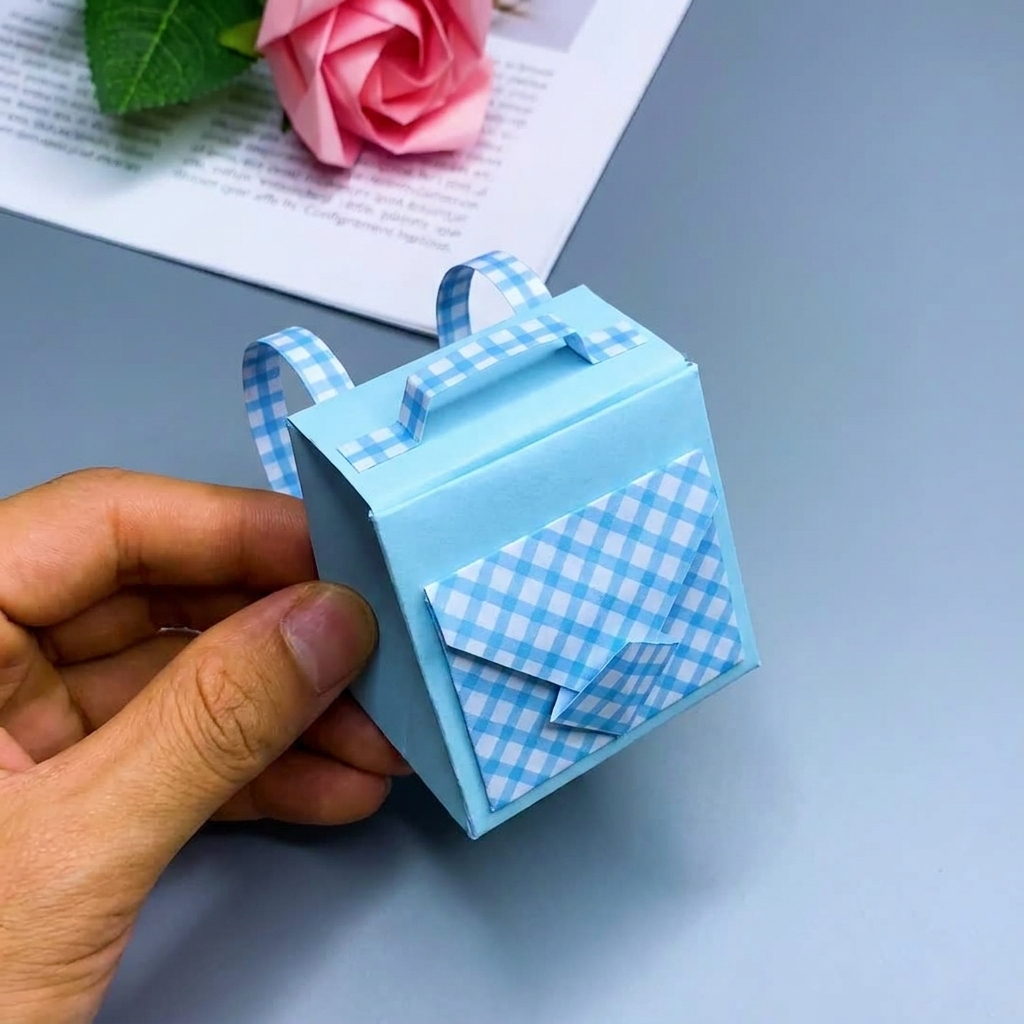
Making a school bag out of paper is a fun and creative activity that children of all ages can enjoy. This simple craft encourages imagination, improves fine motor skills, and teaches kids how everyday objects can be recreated using basic materials. Whether it’s for a classroom project, pretend play, or a back-to-school activity, a paper school bag is an exciting DIY project that combines learning with creativity.
In this guide, you’ll learn how to make a school bag out of paper step by step using easy-to-find materials. The finished craft can be decorated in countless ways, making every paper backpack unique.
Why Make a Paper School Bag?
Creating a paper school bag offers many educational and creative benefits.
Children can:
- Develop fine motor skills
- Practice cutting and folding
- Improve hand-eye coordination
- Express creativity
- Learn about recycling
- Build confidence by completing a project
- Create a fun accessory for pretend school play
It’s also an inexpensive activity that uses materials already found at home or in the classroom.
Materials You’ll Need
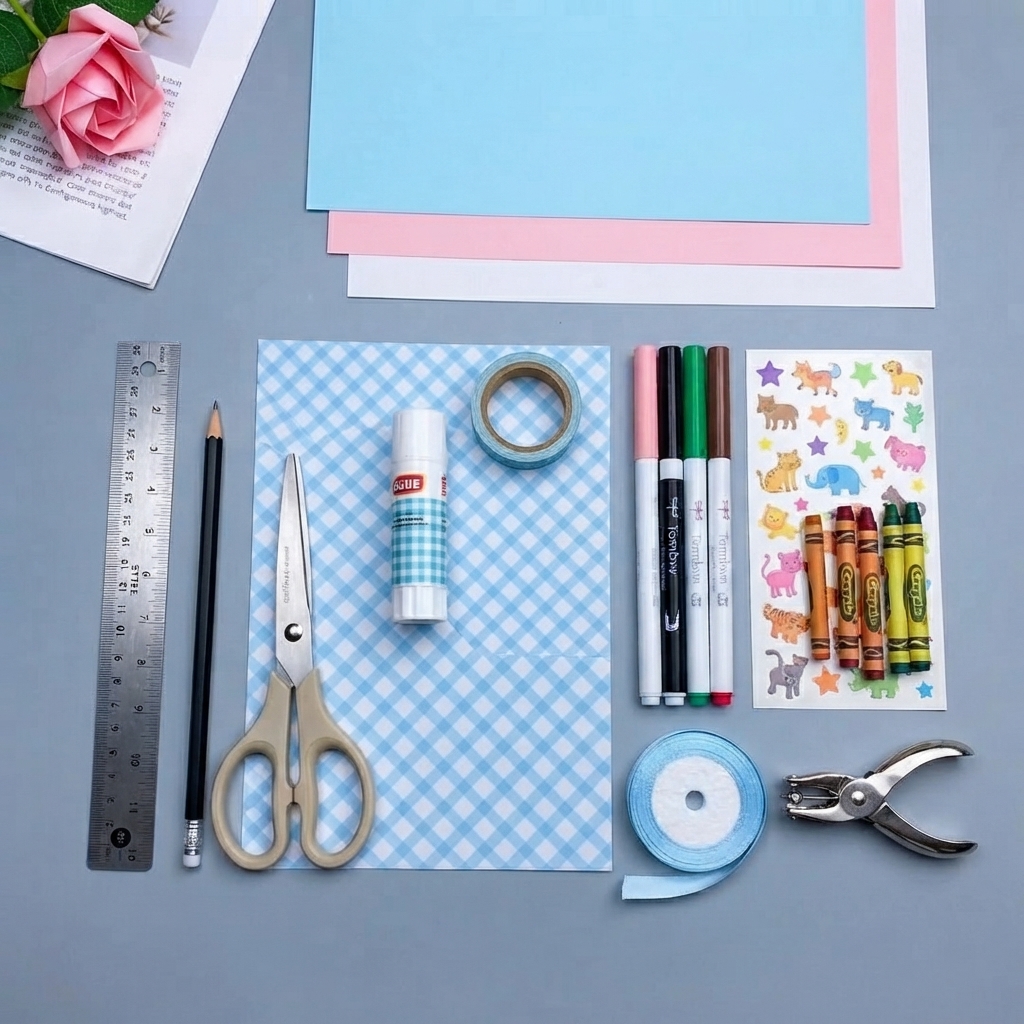
Gather these simple supplies before you begin:
- Colored construction paper or cardstock
- Scissors
- Glue stick or craft glue
- Ruler
- Pencil
- Markers or crayons
- Stickers
- Decorative paper
- Washi tape (optional)
- Ribbon or yarn for straps
- Hole punch (optional)
Choose sturdy paper so the bag keeps its shape.
Step 1: Prepare the Paper
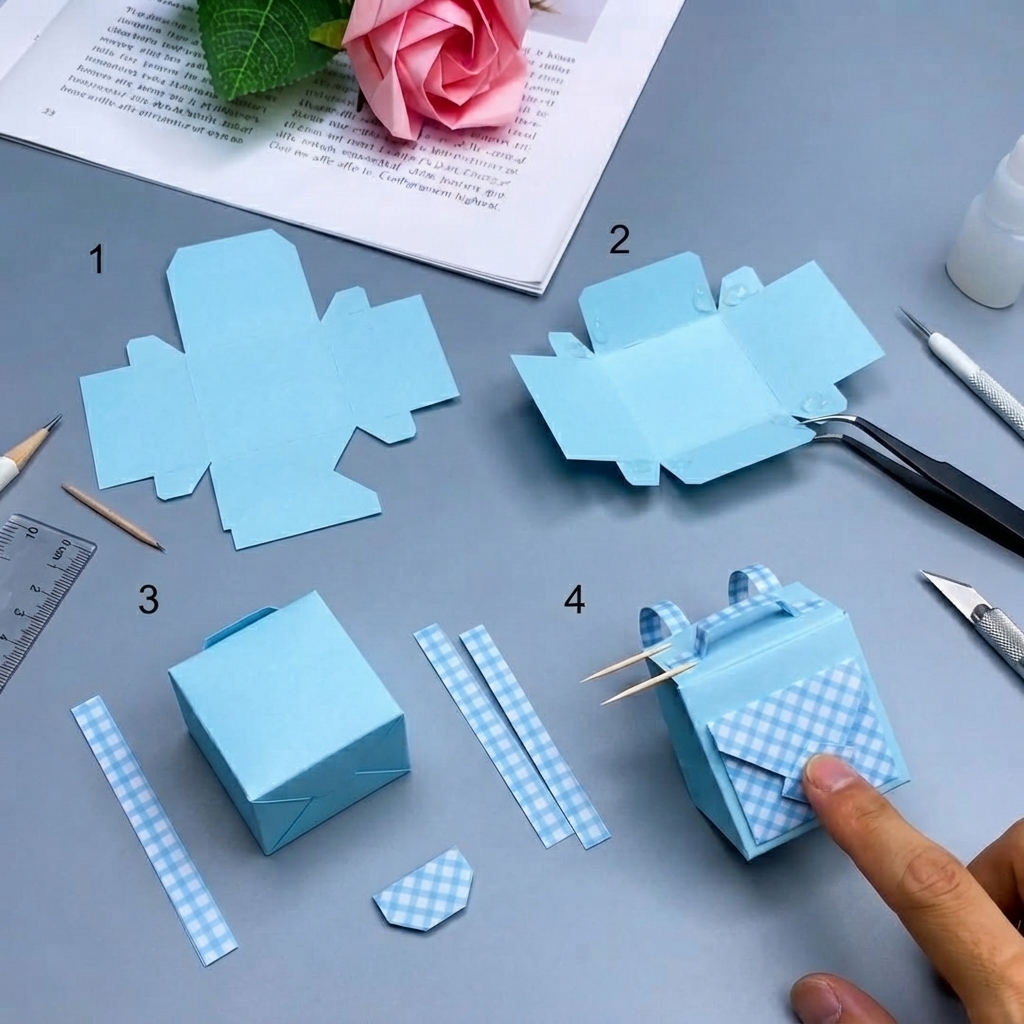
Lay a large sheet of colored paper on a flat surface.
Use a ruler to draw a rectangle that will become the main body of the school bag.
Fold the paper neatly along the marked lines.
Careful folding creates a cleaner and stronger finished project.
Step 2: Fold the Bag Shape
Fold both sides toward the center.
Then:
- Fold the bottom upward.
- Fold the top flap downward.
- Press each fold firmly.
These folds create the basic backpack shape.
Step 3: Glue the Edges
Apply glue along the side flaps.
Press them together gently until they stick.
Allow the glue to dry completely before moving to the next step.
A well-glued bag will be stronger and easier to decorate.
Step 4: Make the Front Pocket
Cut a smaller rectangle from another sheet of colored paper.
Glue it onto the front of the backpack.
The pocket can hold tiny paper pencils, notes, or pretend school supplies.
This simple detail makes the craft look more realistic.
Step 5: Add the Backpack Flap
Cut a rounded or square flap.
Glue only the top edge so it opens and closes.
Children enjoy pretending to pack and unpack their paper school bag.
Step 6: Create the Shoulder Straps
Cut two long strips of paper or use ribbon or yarn.
Attach one strip to each side of the back.
Secure them with glue or tape.
The straps make the backpack look complete.
Step 7: Decorate Your School Bag
Now it’s time to get creative!
Children can decorate with:
- Stickers
- Glitter
- Foam shapes
- Colorful drawings
- Alphabet letters
- Hearts
- Stars
- Flowers
- Cartoon characters
- Animal faces
Every backpack becomes a one-of-a-kind creation.
Creative Design Ideas
Rainbow School Bag
Decorate with colorful rainbow stripes and fluffy clouds.
Animal Backpack
Turn the bag into a panda, fox, bear, bunny, or cat.
Space Explorer Bag
Add rockets, planets, stars, and astronauts.
Dinosaur Adventure
Decorate with friendly dinosaurs and volcanoes.
Princess Backpack
Use crowns, jewels, hearts, and sparkling decorations.
Sports Theme
Draw soccer balls, basketballs, baseballs, or footballs.
Nature Theme
Decorate with flowers, butterflies, trees, and birds.
Personalize the Bag
Children love making their crafts unique.
Add:
- Their name
- Initials
- Favorite colors
- School grade
- Fun quotes
- Number stickers
Personalization helps children feel proud of their creation.
Educational Benefits
Making a paper school bag supports learning in many ways.
Children practice:
- Measuring
- Folding
- Cutting
- Gluing
- Following instructions
- Creative thinking
- Problem-solving
- Fine motor coordination
Hands-on crafts also improve patience and concentration.
Safety Tips
For a safe crafting session:
- Use child-safe scissors.
- Work on a clean table.
- Use non-toxic glue.
- Ask an adult for help when needed.
- Clean up supplies after finishing.
Adult supervision is recommended for younger children.
Classroom Activity Idea
Teachers can organize a “Design Your Dream School Bag” activity.
Each student creates a different backpack design using unique colors and decorations. Afterward, everyone can present their paper backpack to the class and explain the inspiration behind their design.
This activity encourages creativity, communication, and confidence.
Eco-Friendly Craft
Paper crafts are a wonderful way to introduce recycling.
Children can reuse old magazines, wrapping paper, scrapbook paper, or leftover craft paper to decorate their backpacks.
This teaches the importance of reducing waste while creating something useful and fun.
Tips for the Best Paper School Bag
For the best results:
- Use thick paper or lightweight cardstock.
- Fold carefully using a ruler for straight lines.
- Let the glue dry before decorating.
- Keep decorations balanced.
- Reinforce the straps with extra glue.
- Store the finished craft flat to maintain its shape.
These simple tips help create a sturdy and attractive paper backpack.
Conclusion
Learning how to make a school bag out of paper is a fun, affordable, and educational craft that children will enjoy from start to finish. With just a few basic supplies, kids can create a colorful backpack for pretend play, classroom displays, or back-to-school celebrations. This hands-on activity encourages creativity, strengthens important motor skills, and teaches the value of reusing everyday materials. Best of all, every paper school bag reflects the imagination and personality of the child who made it, making each project truly special.
