

A miniature paper school bag is a simple, creative, and educational craft project that can be made with materials that are easy to find at home or in the classroom. Although a real school bag is designed to carry books, notebooks, pencils, and other supplies, a miniature paper school bag is a small decorative model that allows children to explore creativity, design, cutting, folding, and construction. It can be used as a classroom decoration, a school project, a toy accessory, or part of a larger miniature school scene.
Making a miniature paper school bag is especially enjoyable because children can personalize every part of the design. They can choose the color, shape, size, patterns, straps, pockets, and decorations. A simple sheet of paper can become a tiny backpack with a front pocket, shoulder straps, and even miniature school supplies inside. The activity is inexpensive and does not require advanced crafting skills.
The Idea of a Miniature Paper School Bag
The main purpose of this craft is to reproduce the appearance of a school backpack on a much smaller scale. The bag can be designed as a traditional backpack, a small school satchel, or a colorful children’s bag.
A miniature paper school bag can be made using construction paper, cardstock, or lightweight cardboard. Thicker paper is usually better because it creates a stronger structure. However, ordinary colored paper can also work if it is folded carefully or supported with additional layers.
The project can be adapted for different ages. Young children can create a basic flat backpack shape, while older students can construct a three-dimensional version with a real opening and small compartments.
Materials Needed
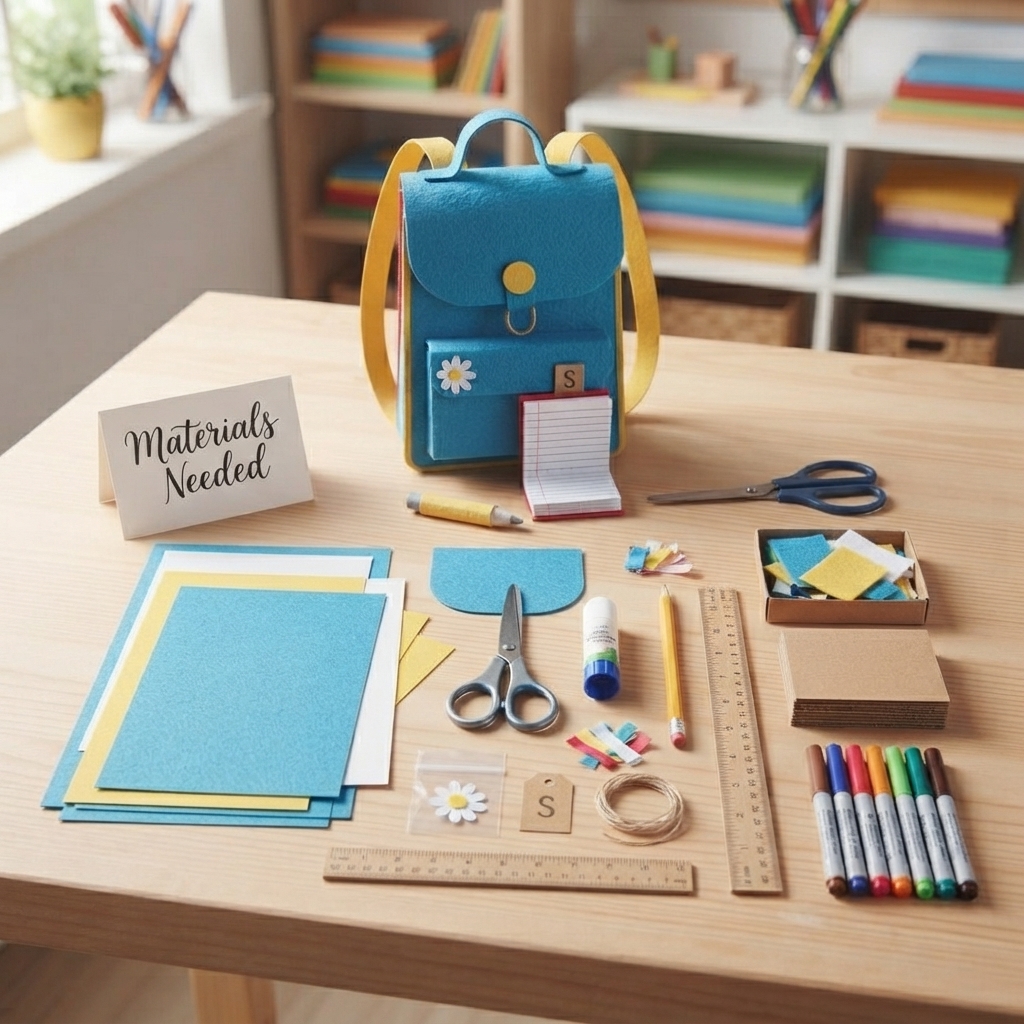
One of the best features of this project is its simplicity. The materials are affordable and commonly available.
Basic materials include colored paper or cardstock, scissors, glue, a ruler, a pencil, and markers or colored pencils. Additional paper can be used to make straps, pockets, labels, and decorative elements.
For a stronger miniature bag, students can use thin cardboard from clean packaging. Stickers, small pieces of ribbon, string, buttons, or paper scraps can also be added.
Before beginning, all materials should be placed on a clean work surface. Children should use scissors carefully and ask an adult for assistance when necessary.
Planning the Design
Before cutting the paper, students should decide what their miniature school bag will look like. Planning helps make the finished craft more attractive and prevents unnecessary mistakes.
The student can first draw the front, back, sides, bottom, and flap of the bag. A simple template can then be transferred onto paper or cardstock.
It is important to think about proportions. Since the project is miniature, the different pieces should fit together properly. The straps should not be too large, and the pockets should be small enough to match the body of the bag.
Planning also allows students to experiment with different shapes. A rectangular backpack is easy to make, but a rounded or colorful design can be more creative.
Creating the Main Body
The main body of the miniature school bag can be made from one carefully designed piece of cardstock or several smaller pieces.
A simple rectangular shape can form the front and back of the bag. Additional strips can become the sides and bottom. Small tabs can be included along the edges so that the pieces can be glued together.
Students should fold the paper along the appropriate lines before applying glue. Making clean folds helps the bag maintain its shape.
If the paper is too thin, two layers can be glued together to make the body stronger. Cardstock is particularly useful because it is firm while remaining easy to cut and fold.
Making the Front Pocket
A front pocket gives the miniature school bag a realistic appearance. It can be made from a small rectangle of colored paper.
The pocket should be slightly smaller than the front of the backpack. Glue can be applied to the sides and bottom while leaving the top open.
The pocket can be decorated with a tiny star, heart, flower, letter, or school symbol. Students can also write a miniature name or initials on it.
An open pocket can be used to hold tiny pieces of paper representing pencils, notes, or other school supplies.
Creating the Backpack Flap
Many school backpacks have a flap that covers the main opening. A miniature flap can be made from a rectangular or rounded piece of paper.
The flap can be glued only along its upper edge so that it can open and close. A small paper button, circle, or decorative strip can represent the fastening mechanism.
For an even more realistic design, students can create two small paper fasteners or straps. These details make the miniature backpack look more like a real school bag.
Making the Shoulder Straps
Shoulder straps are one of the most recognizable features of a backpack. They can be made from long, narrow strips of paper.
Two strips should be cut to approximately the same length and width. They can be folded or layered to make them stronger.
The straps can be attached to the back of the bag. They can either lie flat against the surface or form small loops that resemble real backpack straps.
Students can use a contrasting color for the straps. For example, a blue backpack might have yellow straps, while a green backpack could have orange straps.
Adding a Carrying Handle
A small handle at the top makes the miniature school bag even more realistic. A narrow strip of cardstock can be folded into a curved shape and attached to the top.
The handle should be securely glued because it may be used to hold the miniature bag.
A paper handle can also be decorated with a small pattern. Students can use stripes, dots, stars, or simple geometric shapes.
Choosing Colors
Color is an important part of the creative process. Students can choose their favorite colors or create a design based on a particular school theme.
Bright colors can make the miniature backpack cheerful and playful. Pastel colors can create a softer appearance, while dark colors can give the bag a more realistic look.
Students can also combine two or three colors rather than using only one. A colorful front pocket, contrasting straps, and a decorated flap can make the finished bag visually interesting.
Decorating the Bag
Decoration gives every miniature paper school bag its own personality. Students can draw flowers, animals, stars, sports symbols, geometric patterns, or cartoon-inspired shapes.
They can also add a miniature school logo or a simple letter representing their name.
Another idea is to create a seasonal backpack. A winter-themed bag could have snowflakes, while a spring design could include flowers and butterflies.
The decoration should not make the bag too heavy or difficult to open. Simple paper details are usually enough.
Adding Tiny School Supplies
A miniature school bag becomes even more exciting when it contains tiny school supplies. Students can make miniature books, notebooks, pencils, rulers, and folders from paper.
A tiny notebook can be created by folding several small rectangles of paper and attaching them together. A pencil can be represented by a narrow strip of yellow paper with a small pink or gray section at the end.
A miniature ruler can be made from a thin strip of cardboard with small lines drawn across it.
These tiny objects can be placed inside the backpack or front pocket. This creates a complete miniature school scene.
Creating a Miniature Notebook
A small notebook is one of the easiest accessories to make. Several tiny sheets can be stacked together and folded in half.
A colorful cover can be placed around the pages. Students can draw lines or write tiny words inside the notebook.
The notebook can even contain a miniature drawing. Although the details may be very small, this makes the project more personal.
Making a Tiny Pencil
A miniature pencil can be created from a very narrow strip of colored paper. The strip can be rolled or folded into a thin cylinder.
A small triangle at one end can represent the pencil tip. Another small piece of paper can represent the eraser.
Making tiny objects teaches children patience and precision. It also demonstrates how larger objects can be represented using simple shapes.
Educational Value
The miniature paper school bag is more than a decorative craft. It provides several educational benefits.
First, it develops fine motor skills. Cutting small pieces, folding paper, and applying glue require hand control and coordination.
Second, it develops spatial awareness. Children must understand how flat pieces of paper can be folded and connected to create a three-dimensional object.
Third, it encourages creativity. Students make decisions about colors, patterns, shapes, and accessories.
The project also introduces basic concepts of design and engineering because children must think about how different parts fit together.
Learning About Shapes and Measurements
Teachers can use this craft to introduce mathematical concepts. Students can identify rectangles, squares, triangles, and other shapes in the design.
They can measure the height and width of the backpack and compare the sizes of different components.
Older students can discuss scale. For example, they can imagine that the miniature bag represents a real backpack that is several times larger.
This makes mathematics more practical and connected to everyday objects.
Recycling and Sustainability
Paper crafts provide an excellent opportunity to discuss recycling. Students can reuse clean paper from old projects, packaging, magazines, and cardboard.
Instead of throwing away unused paper, they can transform it into a useful miniature object.
Teachers can explain that recycling reduces waste and helps conserve resources. The miniature school bag can therefore become part of an environmental lesson.
Making the Project a Group Activity
The craft can be completed individually, but it can also become a group classroom activity. Each student can make a different miniature school bag.
Afterward, the bags can be displayed together on a classroom bulletin board. The display could be called “Our Mini School Bags.”
Students can explain the colors and decorations they selected. This encourages communication and allows children to appreciate each other’s creativity.
Another possibility is to create a miniature classroom where every student contributes a backpack. The bags can be placed beside tiny desks, chairs, books, and other classroom objects.
Using the Miniature Bag in Storytelling
A paper school bag can also become part of a storytelling activity. Students can invent a character who owns the bag and describe what is inside it.
For example, a student might imagine that the bag belongs to a young explorer who carries a notebook, pencil, map, and magnifying glass.
This combines art with language development. Children practice describing objects, creating characters, and developing short stories.
Tips for a Successful Project
Several simple tips can improve the final result. First, students should measure carefully before cutting. Second, folds should be made neatly along straight lines.
Glue should be used sparingly. Too much glue can make paper wet, weak, or wrinkled.
Students should also allow the glue to dry before adding additional decorations. If too many pieces are attached at once, the bag may lose its shape.
Finally, creativity should be encouraged. There is no single correct design. The goal is to create a miniature school bag that reflects the student’s imagination.
Conclusion
A miniature paper school bag is an enjoyable and accessible craft project that combines creativity, learning, and practical skills. Using simple materials such as paper, cardstock, glue, scissors, and markers, children can transform flat sheets of paper into a tiny three-dimensional backpack.
The process includes planning the design, creating the main body, adding a front pocket, making a flap, attaching shoulder straps, and decorating the finished bag. Tiny notebooks, pencils, rulers, and other school supplies can be added to make the project even more realistic.
Beyond its artistic value, the miniature paper school bag offers important educational benefits. It develops fine motor skills, spatial awareness, creativity, measurement skills, patience, and problem-solving abilities. It can also introduce lessons about recycling, mathematics, design, storytelling, and classroom organization.
Most importantly, this project shows children that creative ideas do not require expensive materials. A few sheets of paper can become something imaginative and meaningful when combined with careful planning and patience. Whether displayed in a classroom, used in a miniature school scene, or kept as a small handmade toy, a miniature paper school bag is a charming project that makes learning creative, practical, and fun.
